This post may contain affiliate links. For more details, see my disclosure page.
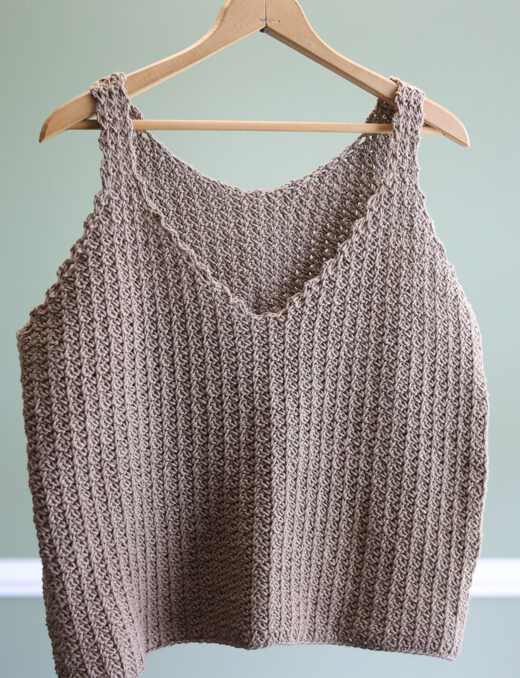
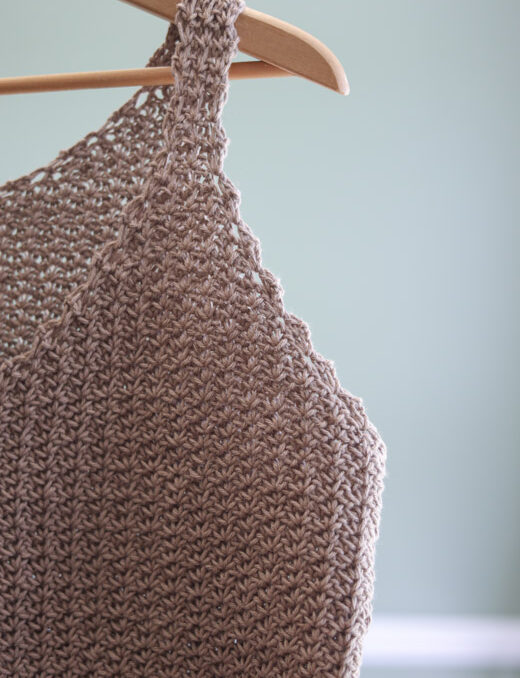
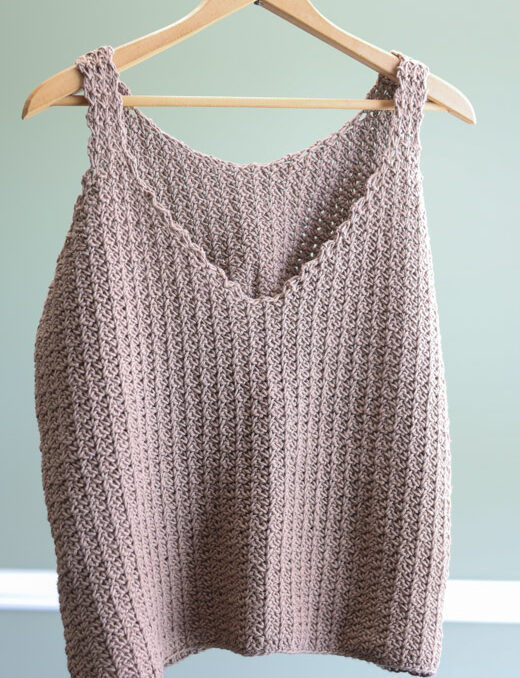
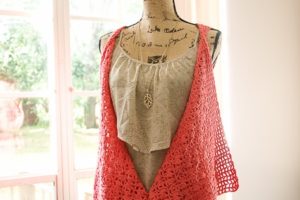
This simple and straightforward crochet cami top makes a perfect first garment project! You’ll love the spider stitch texture and effortless lacy edges.
How do you crochet a simple tank top?
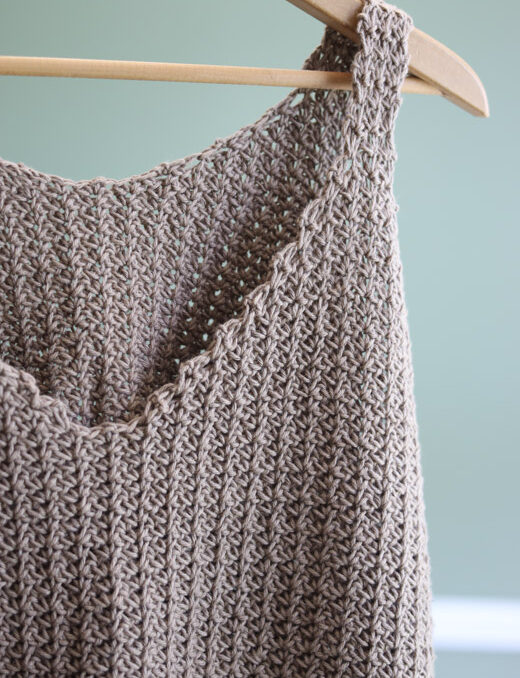
To crochet this tank top pattern, you’ll make 2 pieces, the front and the back. First, you’ll make a rectangular piece for the body of the tank top, then you’ll split and work the V and straps in halves. The back panel is worked in the same way, but with a shallower V for the neck.
When you’re done, you’ll sew two quick seams for each of the sides, and attach the straps together with a short seam as well.
Spring Into Summer Blog Hop Feature!
This easy and free crochet tank top pattern is featured in the Spring Into Summer Blog Hop hosted by Ned and Mimi, HanJan Crochet, and Itchin’ for some Stitchin‘. Click on the Roundup Button just below to find more details about how you can get this crochet pattern for FREE for today only!

How much yarn does it take for a crochet tank top?
The yardage needed to crochet a tank top varies by size, but this tank top takes less than 1400 yards for size 5X, and between 600 and 1000 yards for Sizes XS through XL!
You can find the exact yardage needed in the size chart just below:
Size Chart and Yardage Requirements for the Spider Stitch Cami
| XS | S | M | L | XL | 2X | 3X | 4X | 5X | |
| Bust (in) | 28″ | 32″ | 36″ | 40″ | 44″ | 48″ | 52″ | 56″ | 60″ |
| Length (in) | 19″ | 19″ | 20″ | 20″ | 20″ | 21″ | 21″ | 22″ | 22″ |
| Yardage | 600 | 700 | 750 | 850 | 950 | 1100 | 1150 | 1300 | 1400 |
| Balls of CotLin | 5 | 6 | 6 | 7 | 8 | 9 | 10 | 11 | 12 |
Materials
I/5.5mm Crochet Hook – I recommend a wooden hook like this for working with cotton yarn.
Stitch Marker
Yarn Needle
Scissors
What Kind of Yarn is Best for a Crochet Tank Top?
Disclosure: the yarn I used for this top was graciously provided to me by WeCrochet. Thank you! Opinions are my own.
For a summer tank top, a light weight cotton is best. I have bought WeCrochet (and Knit Picks) CotLin yarn before for my stash, so I knew it would be SO soft and perfect for this project.
The yarn I used for this top was gifted to me by WeCrochet! Thank you so much! CotLin is just so perfect for knitwear like this because it’s very light and soft. If you’ve only ever used dish cloth type cotton before, you’ve GOT to try some of this yarn! I love it so much.
How long does it take to crochet a tank top?
For the Large size, I took around 10-12 hours. However, your time will depend a lot on your crochet speed.
If you want it to go quicker, a few tips are to:
- Wind your yarn into cakes
- Practice a gauge swatch to be familiar with the stitch
- Listen to upbeat music instead of watching TV
- Choose the right hook- you want your hand to be comfortable, and you don’t want your hook to drag on the yarn OR slip and lose your working yarn loop either. A wooden hook was faster for me with this type of yarn.
Buy the Downloadable PDF Crochet Pattern
For May 30, 2023 ONLY, download the PDF for FREE on Ravelry! See the Blog Hop Post for Coupon Code information.

Abbreviations
Ch- chain; Sc- single crochet; Sk- skip; Sp- space; St- stitch;
Gauge
7 repeats and 13 rows in 4” unblocked.
Gauge Swatch Instructions
Gauge Swatch Instructions
Row 1: Ch 16, sc in 2nd ch and across. [15 sc]
Row 2: Ch 1, turn, (sc, ch 1, sc) in 1st st, *sk 1 st, (sc, ch 1, sc) in next st,* repeat * to * across row. [8 repeats]
Row 3: Ch 1, turn, (sc, ch 1, sc) in each ch across row. [8 repeats]
Rows 4-15: Repeat Row 3.
Measure your swatch – again you want 7 repeats and 13 rows in 4″ unblocked.
New to the Crochet Spider Stitch?
You can watch my YouTube Video tutorial for a walkthrough of the gauge swatch, plus some tips for how to crochet the spider stitch easily.
Notes
This top is constructed in 2 pieces, a front panel and a back panel. Each panel begins at the bottom and works upward in one piece, then splits to work on each half of the top and strap separately.
My tank was just longer than cropped, so there are instructions for adding additional length in the pattern.
Turning chains do NOT count as a stitch.
Spider Stitch Cami Top
Sizes are annotated: (XS, S, M)[L, XL, 2X]{3X, 4X, 5X}.
Front Panel
Row 1: Ch (50, 56, 62)[70, 76, 84]{90, 98, 104}, sc in 2nd ch and across.
[(49, 55, 61)[69, 75, 83]{89, 97, 103} sc]
Row 2: Ch 1, turn, (sc, ch 1, sc) in 1st st, *sk 1 st, (sc, ch 1, sc) in next st,* repeat * to * across row.
[(25, 28, 31)[35, 38, 42]{45, 49, 52} (sc, ch1, sc) repeats]
Row 3: Ch 1, turn, (sc, ch 1, sc) in each ch across row.
[(25, 28, 31)[35, 38, 42]{45, 49, 52} (sc, ch1, sc) repeats]
Rows 4-45: Repeat Row 3.
Note: If you want a longer tank top, you may add more repeats here. The panel up to this point will go from the bottom hem to the underarm seam on the side, and the deep part of the V neck, for reference.
Break yarn and fasten off.
Side A
Split for Top Section
Turn and mark chain number (13, 15, 16)[18, 20, 22]{23, 25, 27} with a stitch marker.
For sizes XL – 5X, count and mark chain number (-, -, -)[-, 1, 1]{2, 2, 2} as well.
Row 46A: Join yarn with a standing sc in 1st unmarked chain, ch 1, sc in next ch, *(sc, ch 1, sc) in each ch across, stopping before the marked ch.
[(12, 14, 15)[16, 18, 20]{20, 22, 24} (sc, ch1, sc) repeats]
Row 47A: Ch 1, turn, sc in 1st ch, ch 1, sc in next ch, (sc, ch 1, sc) in next ch and each remaining ch across. [decrease by one repeat]
Repeat Row 47A (8, 10, 10)[12, 12, 14]{13, 15, 17} times or until (2, 2, 3)[3, 3, 3]{4, 4, 4} repeats remain.
Strap
Repeat Row 3 for 12 rows or until strap reaches desired length.
Fasten off.
Side B
Turn and mark chain number (13, 15, 16)[18, 20, 22]{23, 25, 27} with a stitch marker. For sizes S, XL, 2X, and 5 X, this will be the first ch that Row 46A was worked into. For sizes XS, M, L, 3X, and 4X you’ll mark the chain just adjacent to Row 46A, and leave that unworked.
For sizes XL – 5X, count and mark chain number (-, -, -)[-, 1, 1]{2, 2, 2} as well.
Row 46B: Turn piece to begin work from the outside edge of the piece. Join yarn with a standing sc in 1st unmarked chain, ch 1, sc in next ch, *(sc, ch 1, sc) in each ch across, stopping before the marked chain.
[(12, 14, 15)[16, 18, 20]{20, 22, 24} (sc, ch1, sc) repeats]
Row 47B: Ch 1, turn, sc in 1st ch, ch 1, sc in next ch, (sc, ch 1, sc) in each ch across. [decrease by one repeat]
Repeat Row 47A (8, 10, 10)[12, 12, 14]{13, 15, 17} times, or until (2, 2, 3)[3, 3, 3]{4, 4, 4} repeats remain.
Strap
Repeat Row 3 for 12 rows or until strap reaches desired length.
Fasten off.
Back Panel
Rows 1 – 45: Repeat instructions for Front Panel, then fasten off.
Note: If you added extra rows to the front panel, be sure to match for this panel.
For sizes XL – 5X, count and mark chain number (-, -, -)[-, 1, 1]{2, 2, 2} from both outer edges of your piece. These become your new “end” chains
Row 46: Turn, join with a standing sc in 1st ch after the marked chains, ch 1, sc in next ch, (sc, ch 1, sc) in each ch across until 2 unmarked ch remain, sc in 2nd to last ch, ch 1, sc in last ch.
[(23, 26, 29)[33, 34, 38]{39, 43, 46} (sc, ch1, sc) repeats (decrease 2 repeats)]
Row 47: Ch 1, turn, (sc, ch 1, sc) in each ch across row.
Row 48: Ch 1, turn, sc in 1st ch, ch 1, sc in next ch, (sc, ch 1, sc) in each ch across until 2 ch remain, sc in 2nd to last ch, ch 1, sc in last ch.
[(21, 24, 27)[31, 32, 36]{37, 41, 44} (sc, ch1, sc) repeats (decrease 2 repeats)]
Repeat Rows 47 and 48 (3, 4, 4)[5, 6, 7]{7, 7, 8} more times, or until the arm hole matches the front panel. Sizes XL and 2X skip to the next step, but Sizes (XS, S, M)[L, -, -]{3X, 4X, 5X} will require an additional Row 47 Repeat.
Fasten off.
Split into two sections for top panels.
For ease of counting, we will reset the row count to 1 here.
Side A
Row 1: Mark chain number (8, 9, 10)[11, 11, 12]{13, 14, 15} from the end with a stitch marker.
Attach yarn with a standing sc to first chain on outside, ch 1, sc in same ch, (sc, ch 1, sc) in each ch across until 2 ch remain before st marker, sc in 2nd to last ch, ch 1, sc in last ch.
[decreased by 1 repeat]
Row 2: Ch 1, turn, sc in first ch, ch 1, sc in next ch, (sc, ch 1, sc) in each ch across.
[decreased by 1 repeat]
Row 3: Ch 1, turn, (sc, ch 1, sc) in each ch across until 2 ch remain before the end, sc in 2nd to last ch, ch 1, sc in last ch.
[decreased by 1 repeat]
Repeat Rows 2 and 3 for (2, 3, 3) [4, 4, 5]{5, 6, 7} more rows.
Strap
Repeat Row 3 for 6 more rows, or until strap reaches desired length.
Fasten off.
Side B
Mark chain number (8, 9, 10)[11, 11, 12]{13, 14, 15} from the opposite outer edge with a stitch marker.
Row 1: Attach yarn with standing sc to first chain on outside, ch 1, sc in same ch, (sc, ch 1, sc) in each ch across until 2 ch remain before st marker, sc in 2nd to last ch, ch 1, sc in last ch.
[decreased by 1 repeat]
Row 2: Ch 1, turn, sc in first ch, ch 1, sc in next ch, (sc, ch 1, sc) in each ch across.
[decreased by 1 repeat]
Row 3: Ch 1, turn, (sc, ch 1, sc) in each ch across until 2 ch remain before end of row, sc in 2nd to last ch, ch 1, sc in last ch.
[decreased by 1 repeat]
Repeat Rows 2 and 3 for (2, 3, 3) [4, 4, 5]{5, 6, 7} more rows.
Strap
Repeat Row 3 for 3 more rows or until strap reaches desired length.
Fasten off.
Finishing:
With yarn and a yarn needle, sew together the tops of the straps, and the side seams.
Weave in your ends, and block as desired.



Leave a Reply