This post may contain affiliate links. For more details, see my disclosure page.
I’m so incredibly thrilled to have this pattern featured by Kim at Make it Crochet! Click here to enter her giveaway for a hook set and an awesome crochet hook case! (Open until Jan 22, 2018 at midnight.) For those of you visiting who would like a conveniently printable PDF copy, use the discount code Clamshell18 for 50% off your purchase. Click here to add to your favorites or purchase the PDF download on Ravelry!
Just here for the Vest Pattern? Click here to skip the chit-chat and get to crocheting!
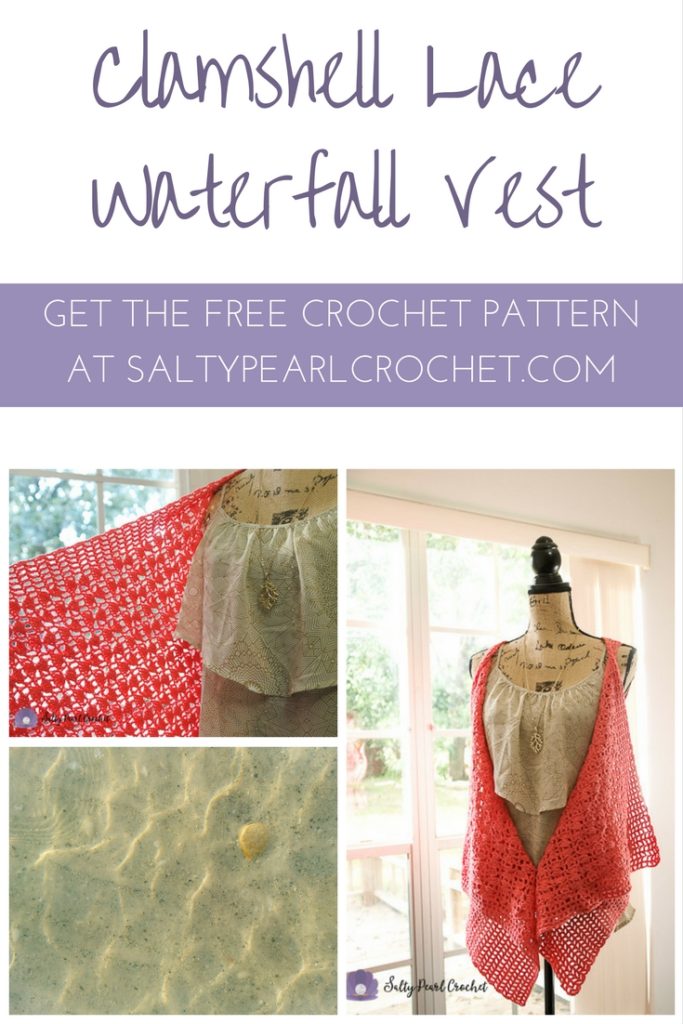
This gorgeous waterfall vest was nearly an entire year in the making. The first whispers of this design came to me during a chilly beach walk early in January. My husband stole me away to the sweetest little inn on the beach in St. Petersburg, Florida. This was to be our very first overnight away from our two kids, and my heart was both full to bursting, and fluttering with nervous excitement. We walked to a fancy French restaurant nearby. I remember the food was exceptional, and I remember wishing I had more to talk about than how much I missed the kids!
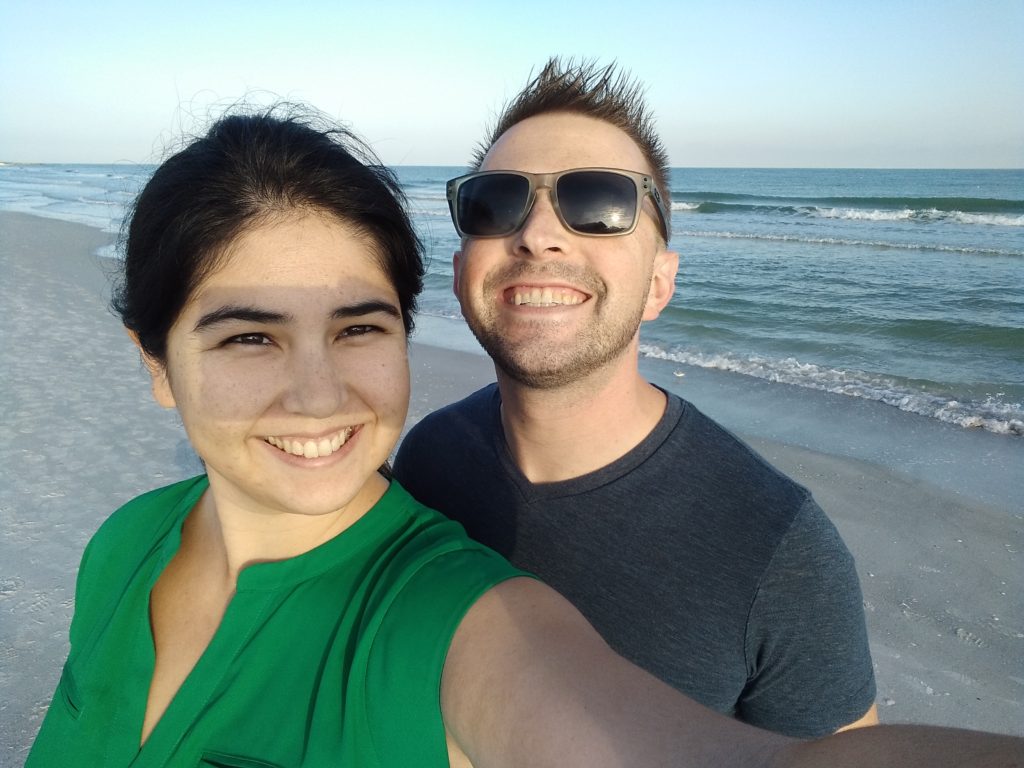
A blink of an eye later, we were two drinks in, shedding our shoes and sinking into the softest sand I’ve felt in ages. My fingers curled around his side, as we shared conversation and body heat, but in my memories, the roar of the waves drowns out all the words. I’m sure they were sweet nothings, sprinkled across that night like little clam shells on the tide line, but I do wish now that I’d held one in my mind to treasure for the lonely months ahead, when he would deploy overseas. A moment later, the frigid water swept across my feet. I wished for something warm to wrap around me, but snuggled close to my husband instead.
Six months later, I’d finished about 6 inches of this vest. The clam shell lace pattern seemed to magically drift from my hook, but I couldn’t bring myself to finish it- not until after my husband was back safe and sound. Somehow, it seems right this way. Just as the reaching and gathering stitches in this pretty lace complement each other, I’m a different woman when I’m with my husband. After more than seven years of marriage, we are lucky to still feel that spark of tension that makes us want to be better people for each other. I hope as you crochet this vest you can think of the one who makes you reach for that best version of yourself.
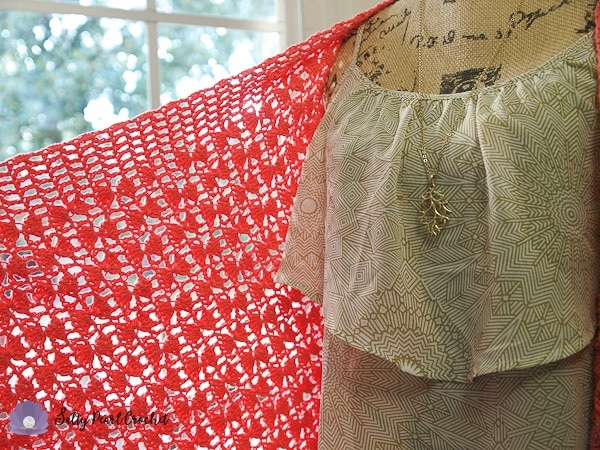
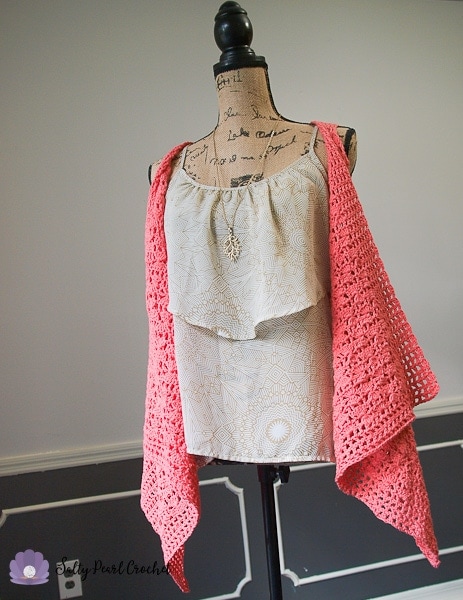
This vest has brought out a romantic side of me that’s been put on hold for a long time, and I’m so thankful for it! We all need a little sand in our toes and a little romance in our life, sometimes. I’ll be wearing my vest on a date with my husband some night this week, but it would be just as home at church on Sunday or at the beach. I like to pair it with my favorite maxi dress, but as you see in the photos, it works just as well with a ruffled camisole and your favorite pair of jeans.
That’s another thing I love about this project. Simple designs allow the most versatility, and give you more bang for your buck. This would make a perfect gentle introduction to crochet lace- there’s no seaming, no shaping, and minimal counting, if you’re clever with your stitch markers.
Materials
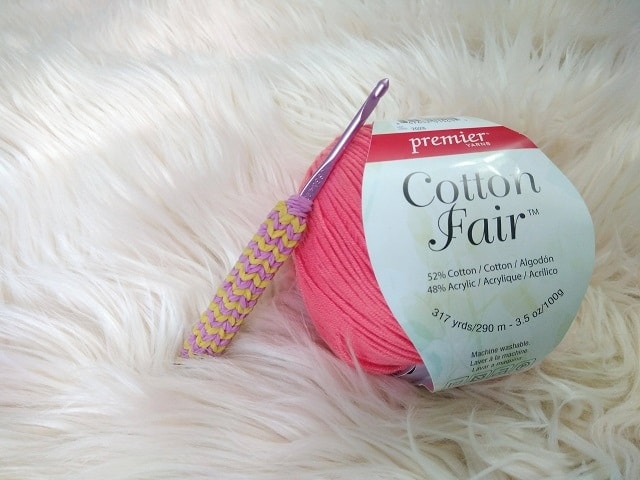
G / 4.00 mm Hook (I highly recommend using an ergonomic grip for this pattern! This one was loom knitted for me by my lovely friend, Marilyn, from the Happy Stitchers knit/crochet club at my local YMCA.)
4 balls Premier Cotton Fair Yarn, Bright Peach (Approx. 1100 yds Fine (2) weight yarn)
Optional stitch markers, to mark the beginning of the lace section
Scissors
Yarn Needle
Abbreviations
Ch- Chain
Dc – double crochet
Dc5tog – double crochet 5 together
Lp – loop
Sk – skip
Yo- yarn over
Special Stitches
5dc shell: 5 Double crochet shell. Make 5 DC into the same stitch or chain space.
Dc5tog: Double crochet 5 together. Yo, draw up lp. Yo, pull through 2 loops. *Yo, insert hook into next st/sp, draw up a lp. Yo, pull through next 2 lps.* Repeat three more times. Yo, pull through all 6 lps on hook. Stitch completed.
Gauge / Finished Size
11 stitches and 4.5 rows double crochet mesh per 2”
Finished size: 22” from shoulder to hem, 51 inches from front panel across back.
Notes
Written for a size M/L. To adjust size, you may add or remove repeats to fit in the back panel section. It should be just about the same width as the wearer’s back, from underarm to underarm.
Prefer a Printable PDF Copy?
Head over to the Ravelry listing and purchase a convenient PDF copy for $1.
Clamshell Lace Vest Pattern
Mesh Edging
Ch 109.
Row 1: Dc in 3rd ch. * Ch 1, sk 1, dc* across. Ch 2, turn. [54 dc, 53 ch sp.]
Row 2-4: Dc in the last dc of previous row, *ch 1, sk 1, dc* across. Ch 2, turn. [54 dc]
Front Panel – Clamshell Lace Pattern
Row 5: Dc, (ch 1, sk 1, dc) 5 times. (Ch 2, dc5tog, ch 2, dc. Sk 2, 5dc shell in center ch sp. Sk 2, dc.) 6 times. (Ch 1, sk 1, dc) 12 times. Ch 2, turn. [6 dc, 6 pattern repeats, 12 dc.]
Row 6: (Dc, ch 1, sk 1) 12 times. {(Dc, ch 1, sk 1) 3 times. Dc, sk 1, 5dc shell in ch sp, sk 3)} 6 times. (Dc, ch 1, sk 1) 5 times, dc in last st. Ch 2, turn. [
Row 7: Dc, (ch 1, sk 1, dc) 5 times. {(Ch 1, sk 1, dc) 3 times. Ch 2, dc5tog, ch 2, dc.)} 6 times. (Ch 1, sk 1, dc) 12 times. Ch 2, turn.
Row 8: Dc, (ch 1, sk 1, dc) 11 times. (Dc, sk 1, 5dc shell, sk 3. Dc, ch 2, dc5tog, ch 2.) 6 times. (Dc, ch 1, sk 1) 5 times, dc in last st. Ch 2, turn.
Row 9: Dc, (ch 1, sk 1, dc) 5 times. {Sk 1, 5dc shell, sk 3, dc. (Ch 1, sk 1, dc) 3 times.} 6 times. (Ch 1, sk 1, dc) 12 times. Ch 2, turn.
Row 10: (Dc, ch 1, sk 1) 12 times. {(Dc, ch 2, dc5tog, ch 2.) (Dc, ch 1, sk 1) 3 times.} 6 times. (Dc, ch 1, sk 1) 5 times, dc in last st. Ch 2, turn.
Row 11: Dc, (ch 1, sk 1, dc) 5 times. (Ch 2, dc5tog, ch 2, dc. Sk 1, 5dc shell in center ch sp. Sk 3, dc.) 6 times. (Ch 1, sk 1, dc) 12 times. Ch 2, turn. [6 dc, 6 pattern repeats, 12 dc.]
Row 12-40: Repeat Rows 6-11 FIVE more times, ending on a row 10 repeat.
Add First Arm Hole
Row 41: Dc, (ch 1, sk 1, dc) 5 times. Ch 35, sk 35, dc. (Ch 2, dc5tog, ch 2, dc. Sk 1, 5dc shell in center ch sp. Sk 3, dc.) 3 times. (Ch 1, sk 1, dc) 12 times.
Row 42: (Dc, ch 1, sk 1) 12 times. {(Dc, ch 1, sk 1) 3 times. Dc, sk 1, 5dc shell in ch sp, sk 3)} 3 times.
Continue working in pattern across the chain as follows: {(Dc, ch 1, sk 1) 3 times. Dc, sk 2, 5dc shell in ch, sk 2)} 3 times. (Dc, ch 1, sk 1) 5 times, dc in last st. Ch 2, turn. [12 dc, 6 total pattern repeats, 6 dc.]
Back Panel
Rows 43-47: Repeat Rows 7-11.
Rows 48-76-: Repeat Rows 6-11, FIVE more times, ending on a row 10 repeat.
Add Second Arm Hole
Row 77: Dc, (ch 1, sk 1, dc) 5 times. Ch 35, sk 35, dc. (Ch 2, dc5tog, ch 2, dc. Sk 1, 5dc shell in center ch sp. Sk 3, dc.) 3 times. (Ch 1, sk 1, dc) 12 times.
Row 78: (Dc, ch 1, sk 1) 12 times. {(Dc, ch 1, sk 1) 3 times. Dc, sk 1, 5dc shell in ch sp, sk 3)} 3 times.
Continue working in pattern across the chain as follows: {(Dc, ch 1, sk 1) 3 times. Dc, sk 2, 5dc shell in ch, sk 2)} 3 times. (Dc, ch 1, sk 1) 5 times, dc in last st. Ch 2, turn. [12 dc, 6 total pattern repeats, 6 dc.]
Second Front Panel
Row 79-83-: Repeat rows 7-11.
Row 84-112: Repeat Rows 6-11.
Mesh Edging
Row 113-116: Repeat Row 2 Four times.
Break yarn, weave in ends to finish. Block lightly if desired.
For those of you who are visual learners, I am working on a stitch chart and size diagram for you- but my lovely family has decided to drag me away from the PC and out fishing on our day off today! I hope you all find some fun adventures to have today, as well!
Thank you so much for reading. I have checked and double-checked this pattern, but I’m only human- please let me know if you have any questions or if I have missed anything at all so I can correct it for you all.
You are more than welcome to sell any finished items made from this pattern. Please use your own photos and credit Katie Clary as the designer. Links back to my blog post are greatly appreciated! Please feel free to share this pattern by directing others to this blog post or the Ravelry listing, NOT by distributing the pattern or photos as your own.
Want to connect? I would love to crochet along with you! Join my mailing list and receive the first updates and even some special promos and discounts in my newsletter, or you can follow me on:
Facebook: https://www.facebook.com/SaltyPearlCrochet/
Pinterest: https://www.pinterest.com/theSaltyPearl/
Instagram: https://www.instagram.com/SaltyPearlCrochet


Ledonna says
Love this! Exactly what I have been looking for. Thank you.
Katie says
Thank you so much, Ledonna! I’m so glad to hear you like it as much as I do!
<3 Katie
Laura Richardson says
Any progress on the chart? I bought the PDF (now two dollars) but I’m really a visual person. I love this and I really want to do it right!
Katie says
Hi Laura! Thanks for your comment. I’m still working on the chart- I wish it were as easy to make them as to crochet them, but graphics isn’t my strong suit, lol! I’ll make an extra effort to get it out this month for you though. 🙂
Laura Richardson says
Thank you so much.
GINGER says
Love this! I’m wondering how long it falls int he back and would it be easy to lengthen.
Thanks!
Ginger
Katie says
Hi, Ginger! I didn’t think to link this photo of the back before, but here’s how it looks from behind:

You could absolutely lengthen it, you’d just need to experiment and figure out the chain multiple for where you want to add length. If you’re extending the mesh pattern, you could just add chains in twos, but if you’re wanting to extend the clamshell lace bit, I believe it’s multiples of 12- but you’d want to look carefully over the pattern to be sure, and it’d affect your yardage used a good deal. Hope that helps- happy experimenting! <3
Katie
MaryLynn says
Hi! I know this is an old post, but I’ve just found this beautiful vest. I’m using a size 3 yarn and wondered if you can tell me approximately how wide the first panel is? Thanks so much!
Katie says
Hi MaryLynn!
I’m so glad you’ve found this! I love it, too. Mine is a bit stretched just from being so well loved, but I can giv eyou the approximate measurements, anyway.
The vest is crocheted all in one piece, with two breaks for the arm holes. My vest measures just about 20″ from the starting edge to the first arm hole, 20″ between arm holes across the back, and 20″ from the second arm hole to the finished edge.
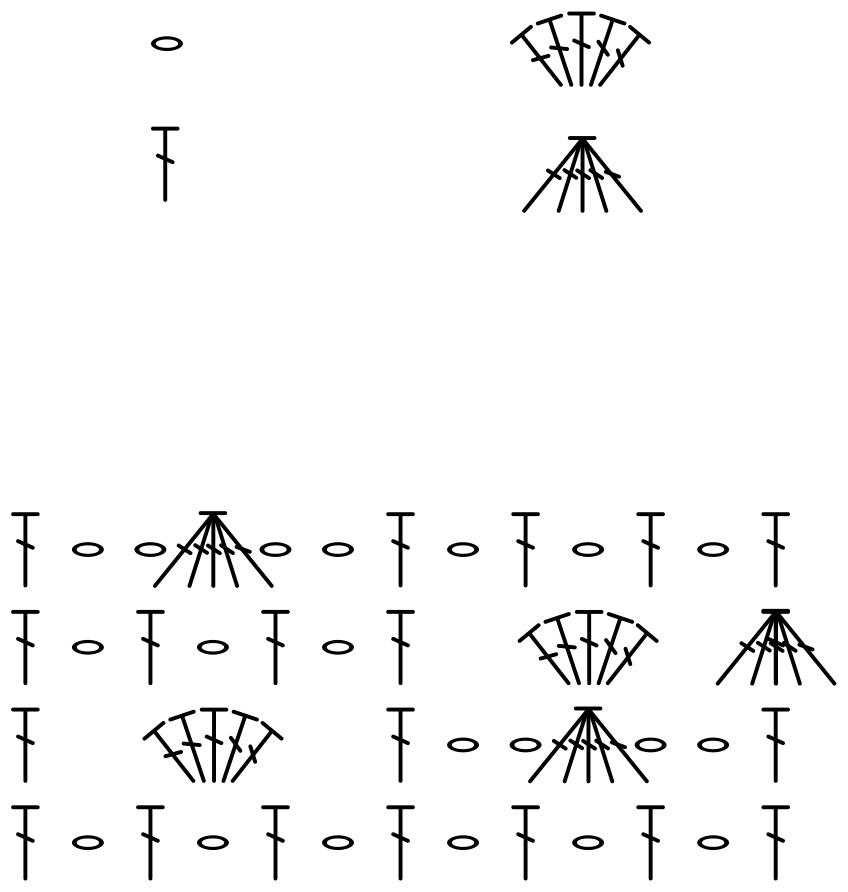
I’ve also finished a stitch chart that should hopefully help the pattern go just a bit more smoothly, too!
Hopefully that’s helpful!
Katie
MaryLynn says
Hi, Katie! Thanks so much for your reply. I realized after I posted this question, that I had purchased the pattern… a year ago… I’m using a size 3 yarn, and it turned out a little wide across my back, so I’m going to take out the second side panel and a couple inches from the back, then redo it. Thanks again!