This post may contain affiliate links. For more details, see my disclosure page.
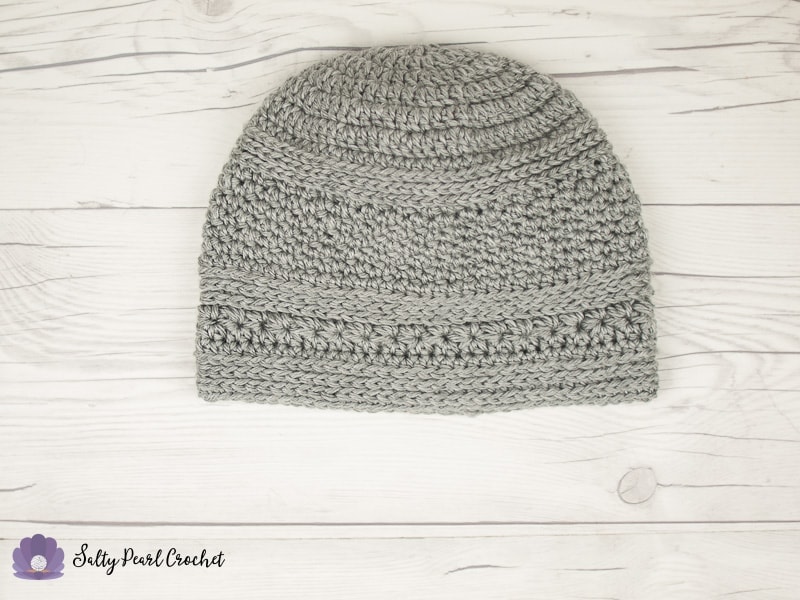
Free Silver Beach Crochet Beanie Pattern for Men
Looking for a mens crochet beanie pattern free online probably qualifies as my second favorite hobby at this point. There are lots of options around, but none of the free crochet hat patterns for men I found looked quite right for my guy! So, I designed a men’s crochet beanie pattern to share with you all!
Want to Download this Pattern?
Scroll down for the free pattern, or purchase your ad-free printable PDF copy at the following sites:

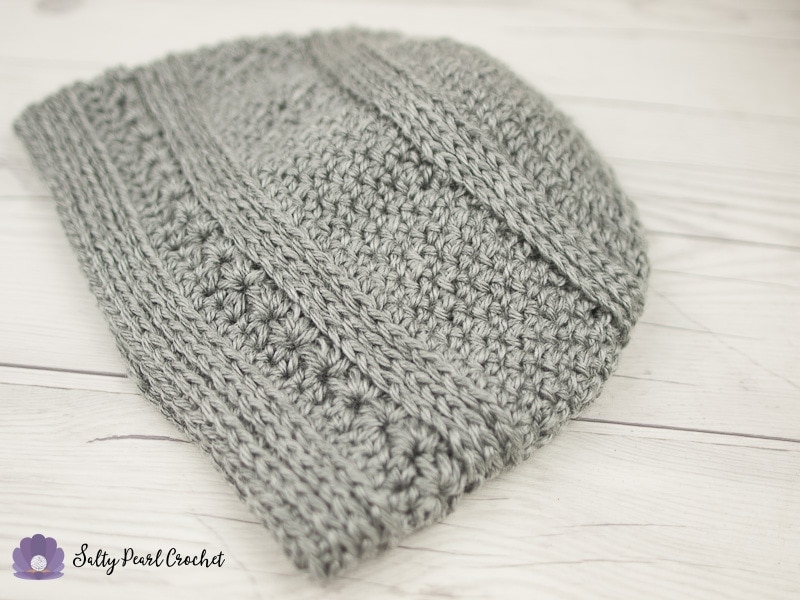
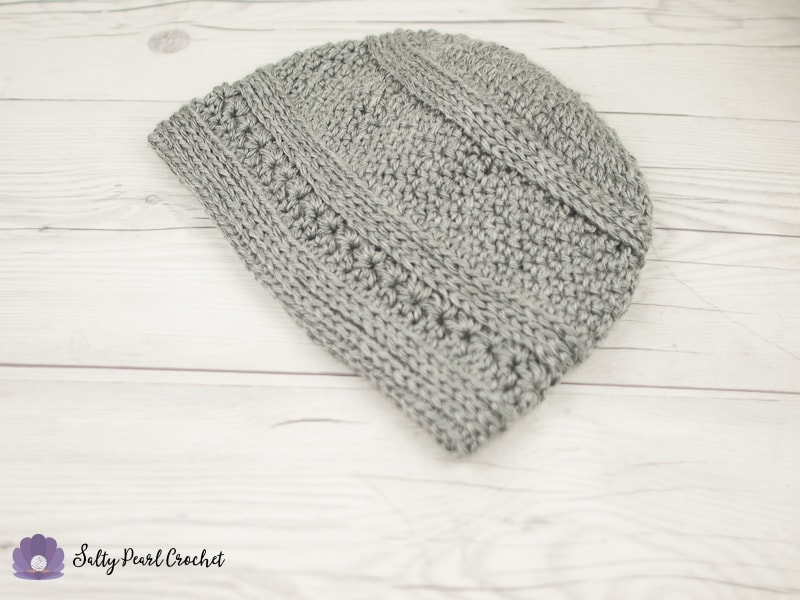
Men’s crochet beanie patterns are best with lots of crochet texture stitches, and this one doesn’t disappoint! I absolutely love the lemon peel stitch texture, but the rows of camel stitch and star stitches take it to another level!
I know my little guy will love wearing his Silver Beach beanie! He almost didn’t let me sneak it back from him to take pictures after trying it on for size.
Psst! Click here to check out the matching scarf pattern!

Add this Pattern to Your Ravelry Favorites
or
Pin it on Pinterest!

Want to Download this Pattern?
Scroll down for the free pattern, or purchase your ad-free printable PDF copy at the following sites:
Silver Beach Mens Crochet Beanie Pattern Materials
H/5.0mm Crochet Hook; Red Heart Soft, 100% Acrylic Worsted (4) Weight Yarn (5oz/141g, 256yd/234m) 1 skein used, shown in Light Gray Heather Colorway; Scissors; Yarn Needle
Abbreviations (US Terms)
Ch- chain, Hdc – half double crochet, Dc – double crochet, Sk – skip, Sl- slip, St- stitch
Special Stitches
HDC through 3rd loop: Yarn over, insert your hook under the 3rd loop of the st, yarn over and pull up a loop, yarn over and draw through all 3 loops on hook.
Star Stitch: For the first star in round, ch 3, pick up a loop in the 2nd ch from hook and next 4 spaces (6 loops on hook), yarn over and pull through all loops on hook, ch 1 to complete st. For next stitches, pick up a loop in the center of previous star, in the legs of previous star, in the same st as previous st, and next 2 sts (6 loops on hook), yarn over and pull through all loops on hook.
Gauge / Finished Size
8 sts and 4 rounds dc = 2” square.
Sized for Baby, Child, and Adult sizes.
Finished hat measures 15”, and 18”, 21”, and will fit a 17”, and 21”, and 23” head.
Notes
Hat is worked from top down, in joined rounds.
Crown of Hat
Round 1: Ch 2, and work 12 Dc into a magic ring, sl to join. [12]
Round 2: Ch 2, work 2 dc into each st around, sl to join. [24]
Round 3: Ch 2, *dc in first st, 2dc into next st,* repeat * to * around, sl to join [36]
Round 4: Ch 2, *dc in first 2 sts, 2dc into next st,* repeat * to * around, sl to join [48]
Stop here for Baby Size.
Round 5: Ch 2, *dc in first 3 sts, 2dc into next st,* repeat * to * around, sl to join [60]
Stop here for Child Size.
Round 6: Ch 2, *dc in first 4 sts, 2dc into next st,* repeat * to * around, sl to join [72]
Worried your hat might not fit perfectly?
I designed this hat with a very simple crown to make it easy to size. You can easily adjust the sizing by checking out my hat sizing tutorial. There’s even a free printable hat size checker to download! Click here to go check it out my flat circle hat sizing tutorial in a new tab.
Ridges
Round 7: Ch 2, hdc in each st around. [48, 60, 72]
Round 8-9: Working through 3rd loops, ch 2, and hdc in each st around. [48, 60, 72]
Baby size: omit round 9.
Lemon Peel Stitch Section
Round 10: Working in 3rd loops of previous round, ch 1, *sc in first st, dc in next st,* repeat * to * around, sl to join. [48, 60, 72]
Round 11: Ch2, *dc in first st, sc in next st,* repeat * to * around, sl to join. [48, 60, 72]
Rounds 12-15: Repeat Rounds 10-11. (Note: You will NOT be working through the third loops.)
Baby size: omit rounds 14-15.
More Ridges
Round 16: Ch 2, hdc in each st around. [48, 60, 72]
Round 17-18: Working through 3rd loops, ch 2, and hdc in each st around. [48, 60, 72]
Baby size: omit round 18.
Star Stitch Rounds:
Round 19: Working through 3rd loops, ch 3, work the star stitch around, working the final star across the slip stitch from the previous row; sl to top of ch to join. [24, 30, 36 stars]
Round 20: Ch 2, work 2hdc in the center of each star around, sl to join. [48, 60, 72]
Brim
Rounds 21-23: Repeat rounds 7-9. Baby size: omit round 23.
Round 24: Working through 3rd loops, ch 1, and sc in each st around. [48, 60, 72]
Fasten off and weave in all ends.

Want to Connect?
Hook up with other like minded crocheters in the Salty Pearl Crochet Circle on Facebook! You can share your WIP photos and get crochet tips, pattern support and more fiber fun.
Be sure to follow me on:


cindyzs says
Love the look. ..I think your yardage is a bit off! 😉
Katie says
Ha! Thanks for letting me know, I fixed it. But you know that would have been a really convenient excuse the next time you’re questioned about how many extra skeins of yarn hop into your cart. 😛
<3 Katie
Leann says
Hello, Sorry but I don’t see this pattern on Ravelry.
Katie says
Hey there! I’ve just made sure my draft got published, sorry for the confusion!
You can see it on Ravelry here.
<3 Katie
Traci Hernandez says
Love this hat!
Kaye Mccormack says
I am about halfway thru crocheting this hat and I must tell you that it is the most fun pattern I have ever done. And it’s a great mens hat – not just DC or HDC I love the texture and the mix of stitches. Love love it!!!!
Katie says
I’m so glad you love it as much as I do! <3 Thanks for leaving such a lovely comment, and I'm glad you love it as a mens hat! Those are so hard to come by.
Joyce says
Love this pattern, especially for an eager beginner like me. I am getting stuck on the second set of ridges, though. When I get to it, and go through the third loop, the ridges go appear in the inside instead of the outside. What did I do wrong?
Katie says
Hi Joyce! I’m so glad you’re enjoying this pattern! If your ridges are appearing on the wrong side of your work, is it possible you might be turning at the end of each row? This hat looks best when you work in joined rounds without turning.
Hopefully that helps, if not, let me know and we can trouble shoot!
Happy hooking!
Katie
Eileen Cooke says
Love this pattern and your tutorial is super. Thanks!
Katie says
You are welcome! Thank you for coming to let me know you made one! Hope you had as much fun as I did creating it!
Katie
Tanya says
thanks for this pattern as well as the sizing lessons. i made this hat for my husband using a wool yarn, and he loves it! don’t know how to post an image.
Katie says
Hi Tanya!
So happy to hear he loves it! I’m always especially proud of a hat that the men in my family will wear.
Happy crocheting!
Katie
Sally says
Hi Katie, can you tell me, do you count the chains at the beginning of each round as a stitch?
Katie says
Hi Sally, great question!
I do NOT count the chains at the beginning of the round as a stitch. I just personally feel my hats look neater in the end.
Usually I try to put a note of this in the notes section, but that’s easy to overlook with all the photos and such.
Thanks for your comment, hope you enjoy crocheting this!
Katie
Marissa says
Hi Katie, I am very confused by some things. When going from round 8 to round 9, how do we join the two? The others had been done by slip stitch and that did not seem to be an option here. Then, when I went from 9 to 10, it looked like I had a stitch too many (unsure if I was counting the “chain” stitch or not by mistake). Can you please clarify how to join from round 7 to 8, and 10-11? Basically, going into the third loop stitch and transitioning out of it. I don’t think I’m doing right. Also, I was not able to work in the 3rd loop on R11, but it doesn’t say to stop working in the third loop until row 12. How am I supposed to do that? Also, how is the “lemon peel stitch” done in the round? I’m not seeing any videos on youtube that show it in the round. It doesn’t look like they are lining up right/well as far as being opposites. Thanks for the help.
Katie says
Hi there Marissa,
That’s a great question. I joined round 8 with a slip stitch into the top of the stitch, just like you would any other pattern. It does create a small “jog” at the join that’s visible, but it’s pretty small and I think it looks just fine. You could slip stitch to the 3rd loop if you wanted to decrease it, but I found that made a bit of a hole that I didn’t like. Experiment and see what you like!
For round 11, you won’t be working through the 3rd loops- there aren’t any since there aren’t hdc stitches! The note on round 12 must have been a bit confusing- it’s just there to indicate that the repeat of round 10 won’t be worked in the 3rd loops. Hope that helps.
Katie
Robin says
I am using an I/5.5mm hook and worsted yarn, and this hat is turning out TINY. I am on row 19 and it’s barely halfway down my head, so there is no way it will be large enough for a man’s head. I do not understand how you are accomplishing this with a hook size smaller! Any suggestions as to what I should do to make it larger?
Katie says
Hi Robin,
From what you’re telling me, it sounds like you probably have a very different tension than me. That’s okay! Everyone’s tension varies depending on how they hold the hook and how tightly they hold their yarn, and even can vary day to day depending on your mood. Lately, I’m told that I have a slightly loose tension. That means sometimes people need to size up a hook size or two from what I’m using.
If you feel confident that you’ve paired the right hook and yarn together, I would recommend you have a look at my Flat Circle Hat Size Tutorial HERE, and see if you might need to add a few stitches to your hat’s crown.
If it’s fitting okay around, but simply too short, you can absolutely just add a few more rounds to the hat in one of the sections.
Wish we could sit down and crochet it together, but I hope these tips are at least a start to help.
Katie
ROSINA V JACKSON says
I’m enjoying this pattern very much…..! I’ve made one and gifted to a friend who is ill. Now I’m working on another and for some reason I’m questioning the instructions on the 11th round, are the stitches done in the third loop like the 10th round?
Katie says
Hi Rosina,
That’s a good question! I did not work round 11 into the third loop, but instead worked through both loops as normal. Neither the dc or sc have an easily accessible third loop to crochet into. 🙂
Hope that helps,
Katie
Shar says
Hi Katie,
I’m so excited to try this pattern! I’ve been saving a special skein of yarn for something to catch my eye and I believe this is it! I love doing hats and this is awesome!
Thank you for posting !
Katie says
Hi Shar!
So glad you love this pattern, too! It’s so fun to make and really isn’t super difficult to remember. Hope you like it as much as I did.
Katie
Sarah Wohlleb says
Great pattern! I made this hat today for my husband. First time in a long time that I have followed a pattern. Thankfully all went as it should.
Katie says
Hi Sarah! So glad you enjoyed making this hat for your husband! I’m glad you enjoyed following the pattern! It’s nice to take a break from our usual routine sometimes, isn’t it?
Happy crocheting,
Katie
PJ says
I’m about 2 weeks into teaching myself to crochet and I LOVE this pattern!! It’s forced me to learn a bunch of new stitches all at once and it switches enough that I don’t get bored…super fun! I think I goofed somewhere as I needed to turn the work twice to make the ridges work. I’m planning to make more of these so I’ll figure it out in the next one!! 😂
With all that’s going on, I’m loving learning a new skill and encouraging others to try your pattern…Thank you for giving us a positive outlet during a really tough time for so many. I appreciate your generosity of gifting us your skill by making this free!!!
Katie says
Hi PJ! So glad you’re enjoying this! I agree, crochet is such a great skill to learn for these. Glad you’re making progress and figuring this one out! I’m really impressed, all the projects I made in my first two weeks were lumpy and ugly! haha.
Hope you have a wonderful week!
Katie
Lauren says
Thank you so much for the pattern. It’s going to make a great gift for my father for Christmas. ❤️
Katie says
So glad to hear that, Lauren! THanks for stopping to comment! <3
Katie
Kara says
Beginner here – I’ve tried this pattern 4 times now and it keeps turning out flat like a giant plate!!! What am I doing wrong??
Katie says
Hi Kara,
This sort of hat starts out like a giant flat plate, then you’ll crochet down the sides of the hat and it’ll start looking more hat-like. For anyone else with this problem, you can learn a lot more about how to make this sort of hat in my Flat Circle Hat Method Guide.
Hope that helps!
Katie
Tammy says
Hi Katie,
I am on row 10 the start of the lemon peel but it is on the inside of the hat and I am not turning the hat. I am working in a circle. Can you help me
Katie says
Hi Tammy, The Lemon peel stitch should be reversible so no worries if you’re on a weird side, it’ll sort out!
Katie
Deborah says
Round 1: Ch 2, and work 12 Dc into a magic ring, sl to join. [12]
Round 2: Ch 2, work 2 dc into each st around, sl to join. [24]
Very pretty pattern but I have two questions to begin. In Round one do you chain 2 and then work 12 dc into first chain or did u man make a magic circle and then chain 2 into it? And as to joining the rounds do u slip stitch into the top of the first dc or the top of the chain 2. Thanx for any help. Keep up your beautiful work. Bless you
Katie says
Hi Deborah,
You’re right, the magic circle should come first, then you chain 2 and make 12dc into it.
For joining rounds, I always skip the chain and work into the stitch- there’s usually a note in my patterns about the turning chains don’t count as a st, but it can be easy to miss when you’re excited to crochet!
Hope that helps,
Katie
Amber says
I love this hat so much I’m make lots of them! It’s now a got to pattern for me thank you so much!! I also am going to make a scarf with the same pattern but a long scarf to match!
Katie says
Hi Amber! So glad you like it! I do have a matching scarf that goes with this now, as a guest post on Underground Crafter. You can see it here: https://undergroundcrafter.com/2020/02/17/mens-scarf-pattern-silver-beach-by-salty-pearl-crochet/
Thanks for your lovely comment!
Katie
Joanne TW says
Thank you so much for this beautifully textured beanie which I can see becoming a favourite.
I used Moda Vera Florentine Collection yarn which is a mix of wool, alpaca, silk and acrylic and it made up so pretty.
Katie says
Hi Joanne!
Thanks for the lovely comment! Wish I could see the hat done up in your yarn, that sounds SO luxurious!
Katie
Esther Pearl says
Hi Katie I just have a question about the very start – chaining two, and then working 12 into a magic ring… can I ignore the first ch 2 and start with magic ring?
kind regards
Katie says
Hi Esther,
Yes! It sounds like we are saying the same thing 2 different ways. You start with the magic ring, and then the ch 2 is your “turning chain” so you can get the height to work 12 dc into the magic ring. Hope that explains it better.
Katie