
This post may contain affiliate links. For more details, see my disclosure page.
Joining new yarn in crochet doesn’t have to be ugly. You don’t need a yarn needle to join yarn in crochet either! This straightforward method of joining new yarn in crochet saves time and frustration, and it STAYS put!
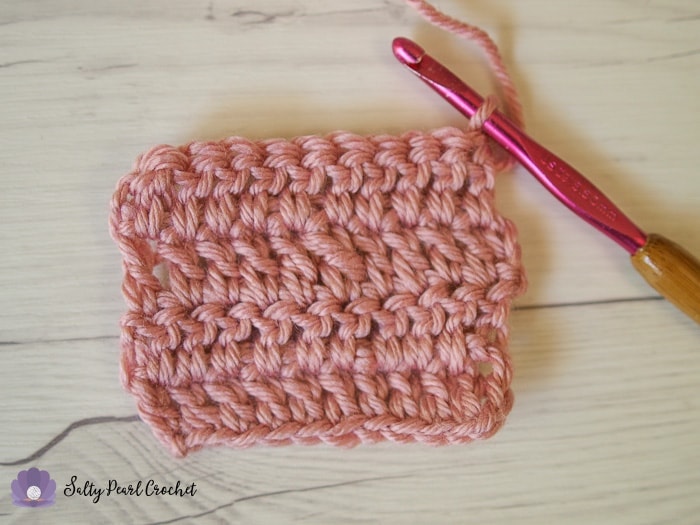
Even better? It’s nearly invisible. Quick question: can you find my yarn join in this swatch?
No? How about now?
Okay, I kinda saw it a little. How about we zoom in again?
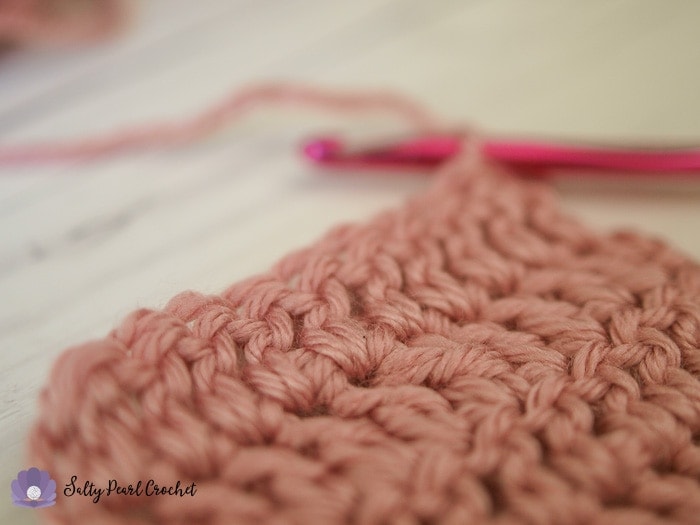
Oh, well now I can’t see it again! I’ll give you a hint- it’s the fifth stitch in the middle row. You can’t see it unless you know to look for the doubled strand of yarn. Both ends are securely worked into the fabric, so you can be confident in the quality and wearability of your work!
Pin this for later!
So how can you make this join? Let’s get started!
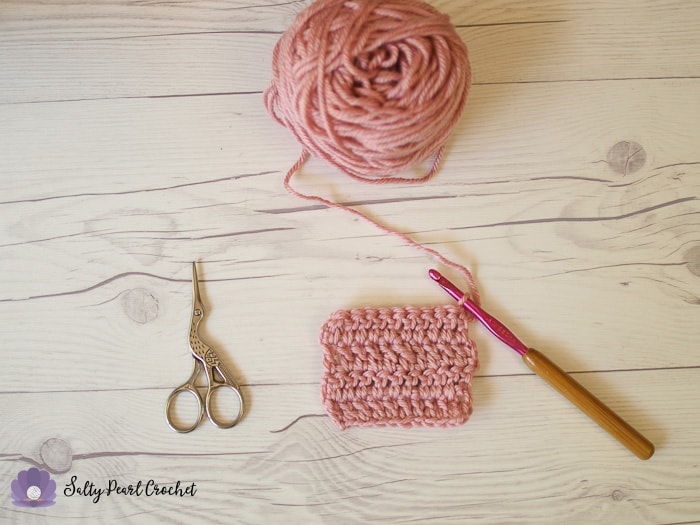
Materials
This post contains affiliate links. If you purchase through them, I may receive a small commission, which helps support the free tutorials and patterns on my blog. Thanks!
This join works for any color yarn, but looks best and is less noticeable in solid colors of yarn. You can apply this technique to every fiber and weight.
For this tutorial, I’m using Red Heart Soft yarn, which is a worsted weight, 100% acrylic yarn. The pink in the sample is the Rose Blush, and the deeper red is in the Berry color way.
This method of joining new yarn in crochet works for any stitch pattern. It’s a bit easier to work in the ends if the fabric is more solid than lacy, but I’ve used this technique in moss stitch and granny square patterns, as well.
How to Join New Yarn in Crochet Easily and Invisibly
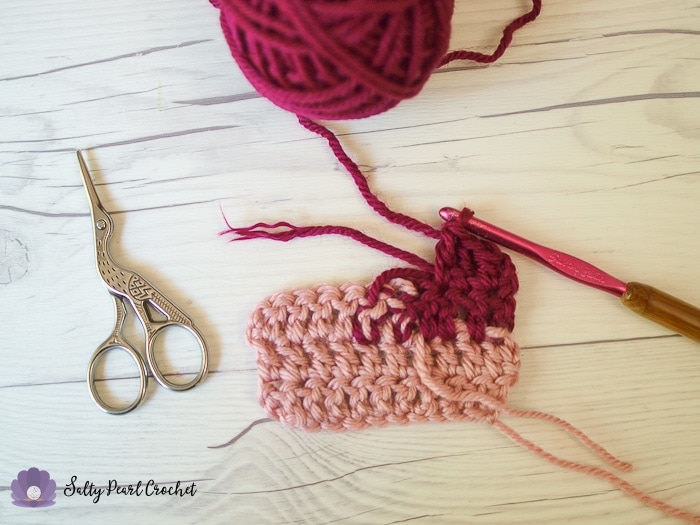
First, you’ll crochet until you come to the end of your yarn. You’ll need to make sure you leave a bit of a tail so you can weave it in later. I had about 8″ here, give or take.
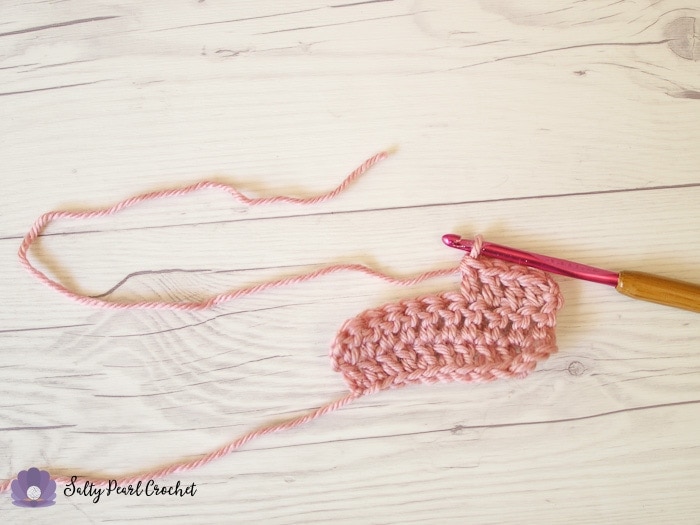
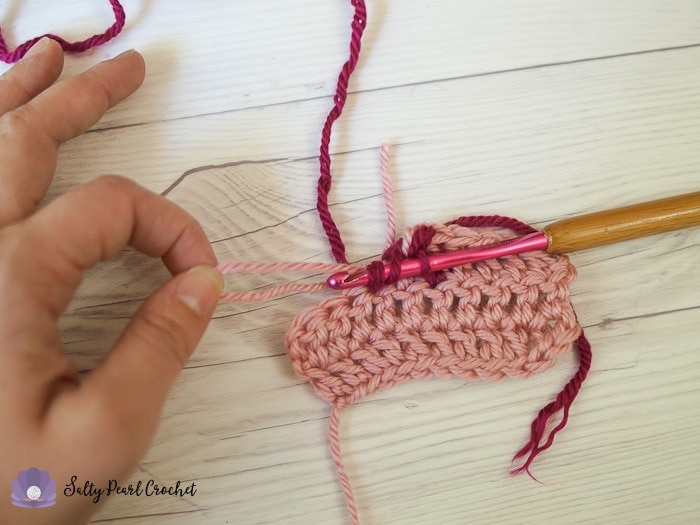
Next, take your new yarn and join it alongside your yarn. Again, make sure you leave a generous tail, so you can work it in later using the locked loop ends technique!
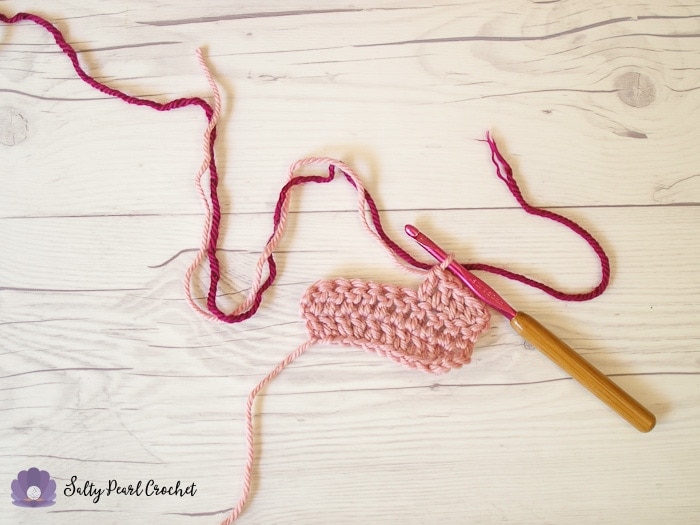
Holding both strands of yarn together, work your stitch as normal. In this case, our sample is in double crochet, so using both pieces, yarn over, and insert your hook in the stitch, yarn over and draw up a loop with both strands.
Then, complete your stitch as normal, just holding both strands together.

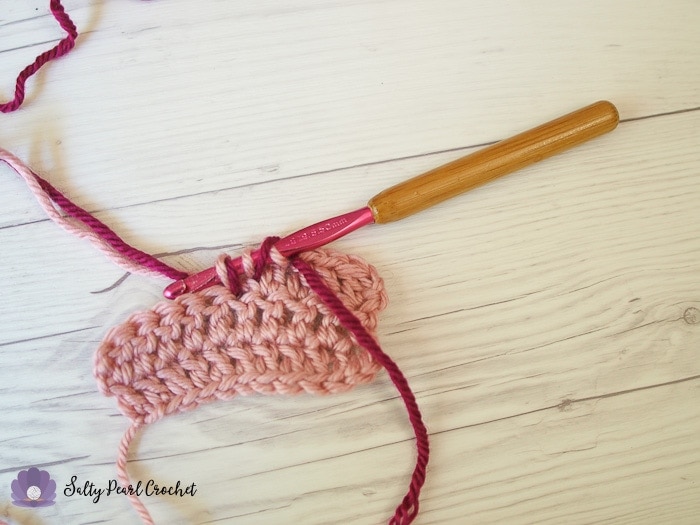
If you’re making a taller stitch, such as the double crochet in this example, you’ll need to bring the end of your initial yarn tail down to the level of your stitches to work it in. To do that, you’ll need to yarn over with two strands again, and yarn over and draw up a loop using both strands. You’ll complete this stitch using only the new yarn.
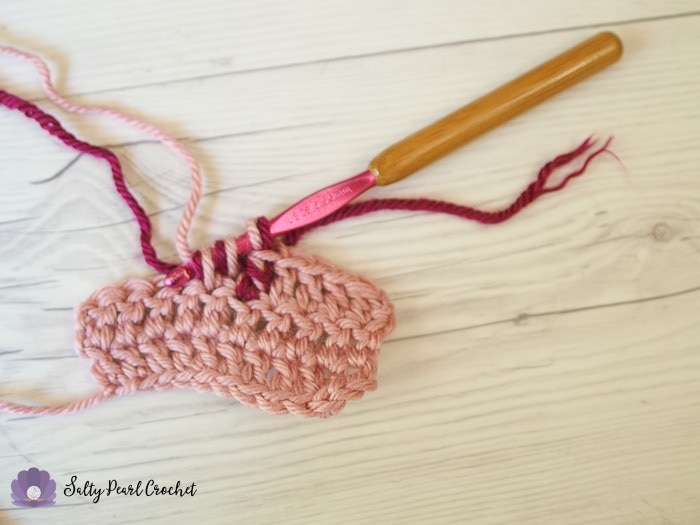
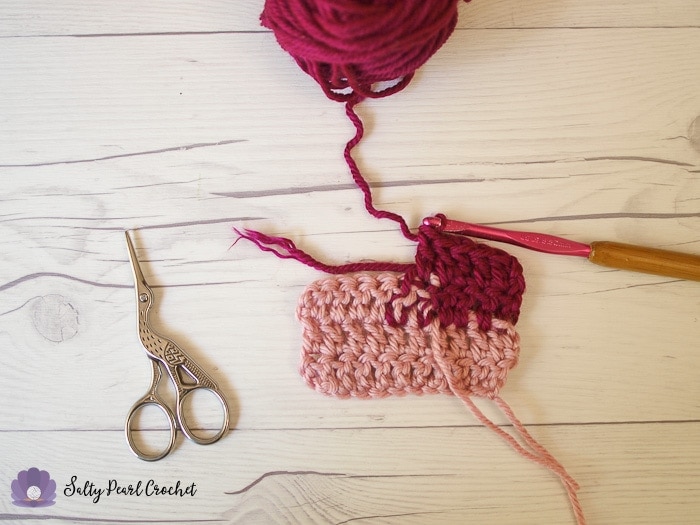
Using only the new yarn, start working over your tail. Fold it over, and work over your stitch and both ends. (For more guidance on this, you can see the full Locked Loop Ends Rows tutorial here.)
Work over the looped end until you reach the end of your row (or the end of your loop) and then work into the stitch and through the loop.
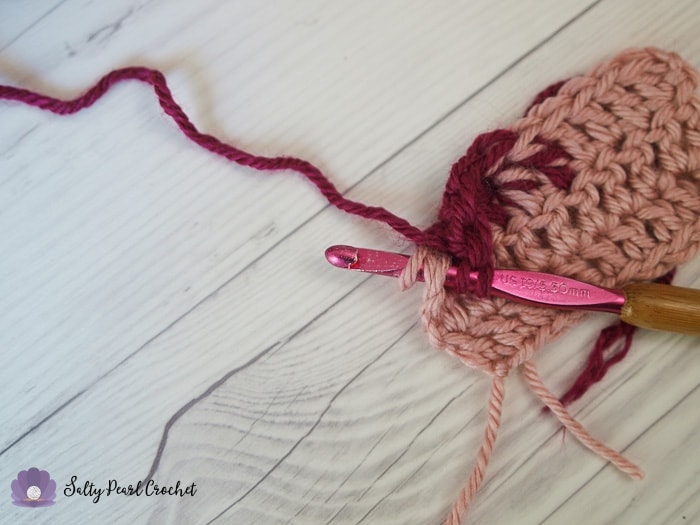
Pull tight, and snip the end with your scissors. One end is locked in! Now you can chain, turn, and continue the next row.
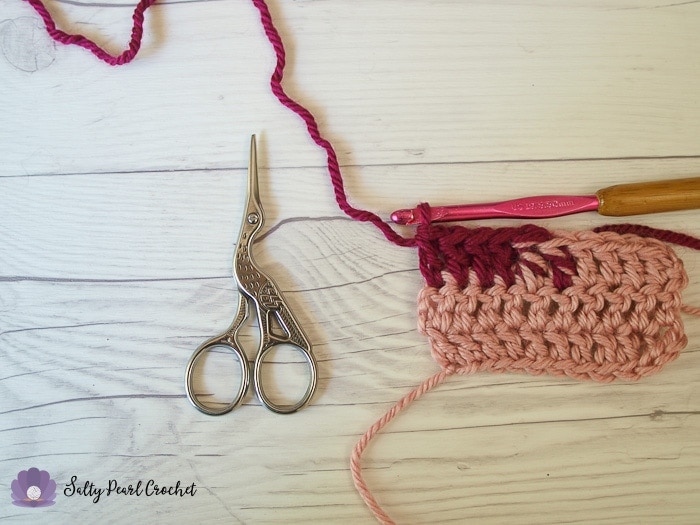
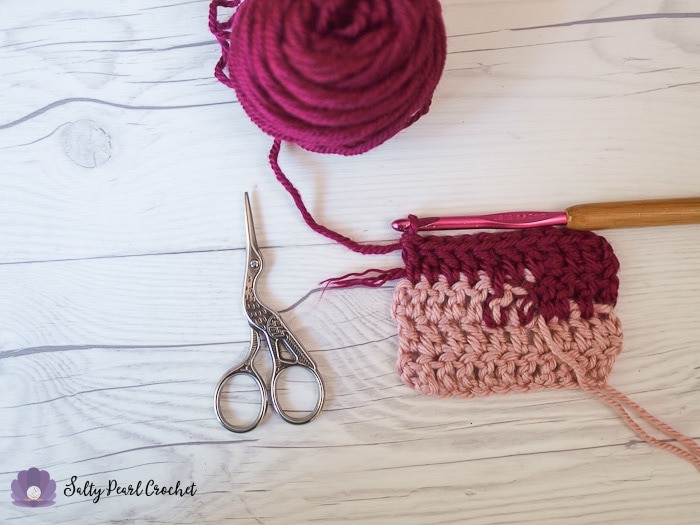
When you approach the join, you’ll want to work in the tail of your new yarn.
Fold it toward your stitching, and work over one end. Then, bring the tail back, and secure both halves of it down to your next stitch.
Continue on in this fashion. When you reach the join, work over both ends one last time.
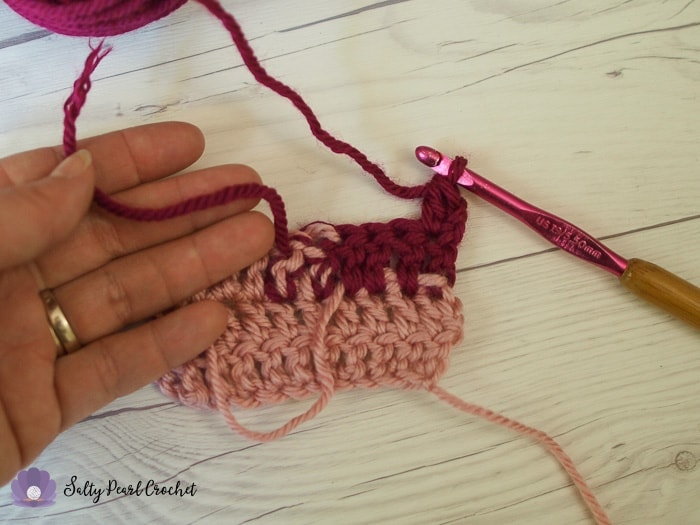
Then, you can simply work over your remaining end by itself. Continue to the end of the row, or the end of your tail.
Trim the tail, and admire your handiwork!
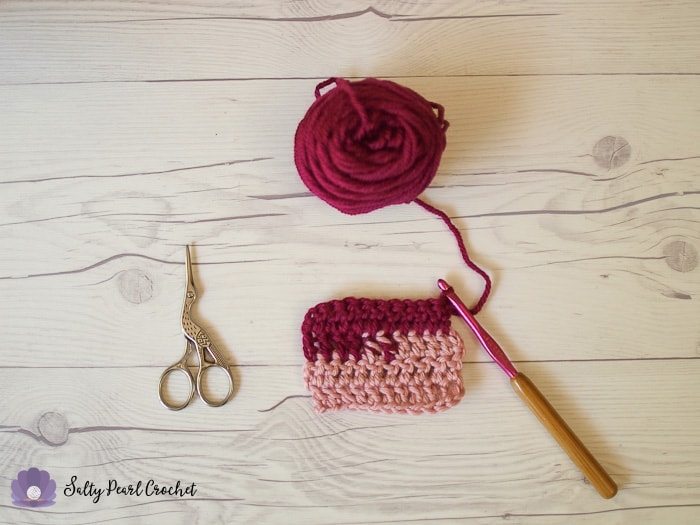
In the solid color sample, you can barely see it until you know exactly where the join occurred. Perfect for seamless crocheting in bigger projects, like afghans or baby blankets. Depending on the placement of the join, I might even use it on a sweater. You could easily tuck away the join below an underarm.
I really hope this tutorial helps make crocheting quicker and more enjoyable for you! I love sharing useful, time saving crochet tutorials like this one.
If you enjoyed this tutorial, I’d love to keep in touch! If you subscribe to my email newsletter, you’ll receive a coupon for one free pattern PDF on Ravelry along with email updates when I publish super helpful tutorials like these.
Want to connect? Join the Salty Pearl Crochet Circle on Facebook to hang out with me, and lots of fun crocheters!

Helen says
Would you have a video of this tutorial? Sometimes it is easier to see it “in action” as it is being done compared to pictures. Thank you for all the hints you have posted – hopefully you will have a video on the other methods you have posted. Many thanks again for all the hints.
Katie says
Hi Helen! Unfortunately I don’t have this specific tutorial video taped yet… BUT I just got a brand new camcorder for Christmas! I hope to film videos for all my posts starting early January. <3
Thanks for stopping to comment!
Katie
Mary Esser says
I like this technique. I will try it on my next project. Thanks for sharing.
Tammy Steinman says
Thank you for this tip on joining new yarn. I have always just knotted the two yarns together, which made a hard bump in the yarn. This looks so much nicer and no bumps or ends to sew in. Can’t wait to try your way.
Katie says
So glad you like it, Tammy! <3 There are definitely times when it's good to use a knot but I prefer this way because I never have bumps and I don't have to go searching for yarn needles! 🙂
Katie