This post may contain affiliate links. For more details, see my disclosure page.
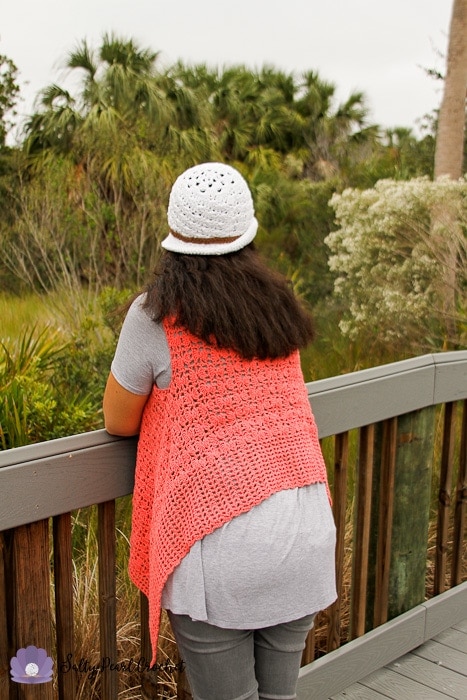
All my life, I’ve been enamored with hats. I’ve worn cowboy hats, baseball caps, beanies, and even (briefly!) a heinous bucket hat, circa 2000! Somehow, though, I never seemed to find one that really fit me. Now that I’m finally settling into our beach lifestyle and embracing my gypsy soul, instead of trying to force her into a preppy, business casual uniform, I’ve finally found it! I’m naming it the Bay Breeze Cloche, after the beautiful waters of Tampa Bay you can see in my photos here. Hopefully this will be the first of many fun hats in my future!

Crocheted in cotton, the airy, vented crown of the hat is perfect for protecting unruly tresses from the chilly sea breeze without holding in too much heat. For those of you in colder weather, try wool for some added warmth. (Or come visit me down in Florida!)

The cloche style brim looks amazing folded up for some vintage flair. You could also pull the brim down to shade your eyes- though if you’re on a white sandy beach like I was in this photo, it will likely still be too bright!

The 5 strand leather braided hat band really makes this cloche shine! I included a brief tutorial to make your own, including a link to the video I used to learn. If leather and lace doesn’t suit you, it looks great plain or dressed up however you choose. It’s also a great complement to my free Clamshell Lace Vest pattern!

Ready to get started? First, pin it on Pinterest or add it to your Ravelry favorites so you don’t lose track! Prefer to work offline? I’ve made a convenient, ad-free, PDF copy available for purchase on Ravelry for $2.

Materials
K / 6.0 mm Crochet Hook
1 Skein Hobby Lobby I Love This Cotton! Yarn (or approx. 160-180yds (4) worsted weight yarn)
Scissors and yarn needle for finishing
Optional: 5 yards suede cord, and 8” elastic tape to make the braided leather hat band, plus either a sturdy needle and thread or e600 jewelry adhesive.
Abbreviations
Ch- Chain
Sc- single crochet
Dc – double crochet
Sk – skip
St – stitch
Sp – space
Special Stitches
Shell -5Dc into the same st.
Small Shell- 4Dc into the same st.
Space – Instead of crocheting into the stitch, work into the gap between shells.
Gauge / Finished Size
6 stitches and 3 rows per 2” in shell pattern.
Finished hat will fit a ladies S/M at 21-22”, and M/L at 22-23”. Shown in size M/L.
Bay Breeze Cloche Hat Pattern
Crown
Ch 6, slip to join.
Round 1: Ch 2, *Dc, ch1* 8(9)times. Slip to first Dc to join.[8(9)Dc, 8(9)ch sp]
Round 2: Sl. ch2, *Dc, ch 1, Dc, sk 1.* Repeat around. [8(9) V sts]
Round 3: Ch 2, *4Dc in next ch sp, sk 2* around. [8(9) Small Shells]
Round 4: Ch 2, 3Dc in prev space between the small shells. *5dc Shell in next sp, sk 4* ending with 2Dc to complete the first shell. [8(9) Shells]
Round 5: Ch 1, *sc, sk2, Shell in sp, sk 2* around, slip to join. [8(9) Shells and 8(9) sc]
Side
Round 6: Ch 2, 3Dc. *Sk 2, sc. Sk 2, 5Dc* around, ending with 2Dc in the first stitch to complete the first shell. Slip to join.[8(9) Shells and 8(9) sc]
Round 7: Ch 1 *sc, sk2, 5dc, sk 2* around, slip to join. [8(9) Shells and 8(9) sc]
Round 8-15: Repeat Rounds 6 and 7.
Round 16: Repeat Round 6.
Brim
Round 17: Working through back loop only, Ch 1, Sc in each stitch around. Slip to join. [48(54) sc]
Round 18: Ch 1,* 2sc in next st, sc in next 2 sts.* Slip to join. [64(72) sc]
Round 19: Ch 1, *2sc in next st, sc in next 3 sts.* Slip to join. [80(90) sc]
Round 20-24: Ch 1, sc in each st around. [80(90) sc]
Finishing:
Break yarn. Pull through last stitch, and weave in all ends with a yarn needle. Block lightly with just your fingers, or put it on and adjust the brim to your liking. Feel free to add salt water breezes and sandy toes for ambiance!

If you love the look, I got this amazing striped Ruffle Tunic from my good friend Brianna, who has an Agnes and Dora Boutique. The gray shirt I’m wearing above is her Muse Tunic. Go check her out at ShopWithBri.com!
Leather Braided Hat Band:
Cut 5 equal pieces of suede or faux suede cord measuring 36” long. Use a piece of masking or painter’s tape to hold the first inch of the cords side by side in a flat band.
Cross strand 1 over 2, and 5 over 4. Cross strand 3 over 4. Cross the new strand 3 over 2. Find a handy video tutorial here: https://www.youtube.com/watch?v=jikCwVXfky4 Continue for the length of your cords, then fasten the ends together with another piece of tape.
If your braid is within an inch or two of your head circumference, great! If not, you can stretch a bit more length from the braid by gently bending it from side to side to tighten the braid.
Sew or glue the elastic tape to the ends of your leather braid to create a removable stretchy hat band. My final hat band measured 23” around, with 22” of leather braid and 1” of stretchy elastic for easy removal.
Thank you so much for supporting my blog! I have checked and double-checked this pattern, but I’m only human- please let me know if you have any questions or if I have missed anything at all so I can correct it for you all.
You are more than welcome to sell any finished items made from this pattern. Please use your own photos and credit Katie Clary as the designer. Links back to my blog post are greatly appreciated! Please feel free to share this pattern by directing others to this blog post or the Ravelry listing, NOT by distributing the pattern or photos as your own.
Want to connect? I would love to crochet along with you! Join my mailing list and receive the first updates and even some special promos and discounts in my newsletter, or you can follow me on:
Facebook: https://www.facebook.com/SaltyPearlCrochet/
Pinterest: https://www.pinterest.com/theSaltyPearl/
Instagram: https://www.instagram.com/SaltyPearlCrochet


Leave a Reply