This post may contain affiliate links. For more details, see my disclosure page.
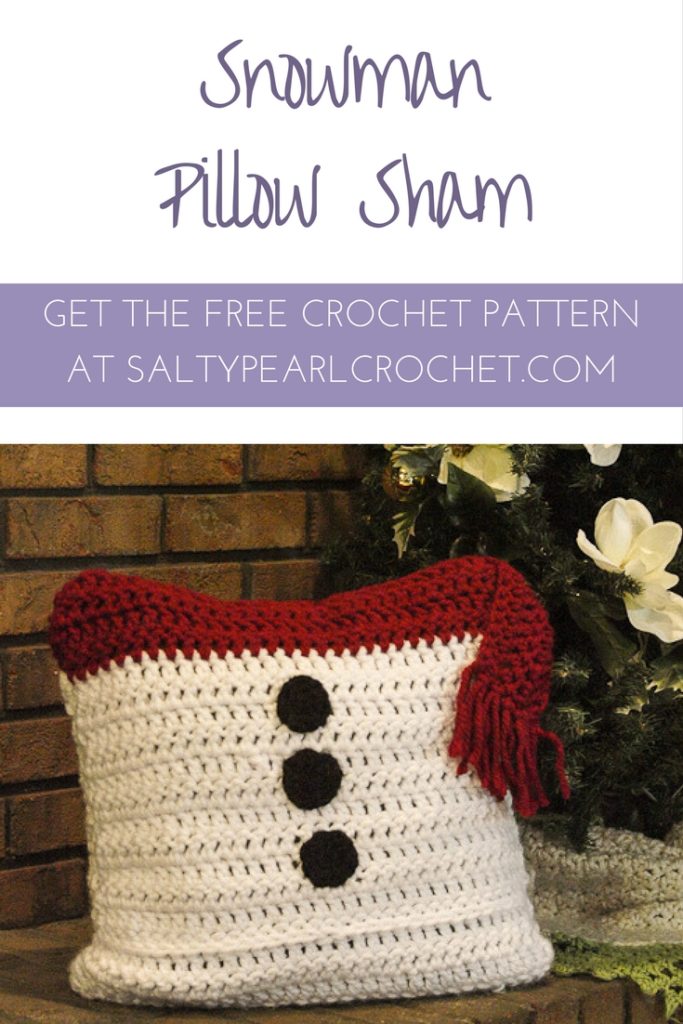
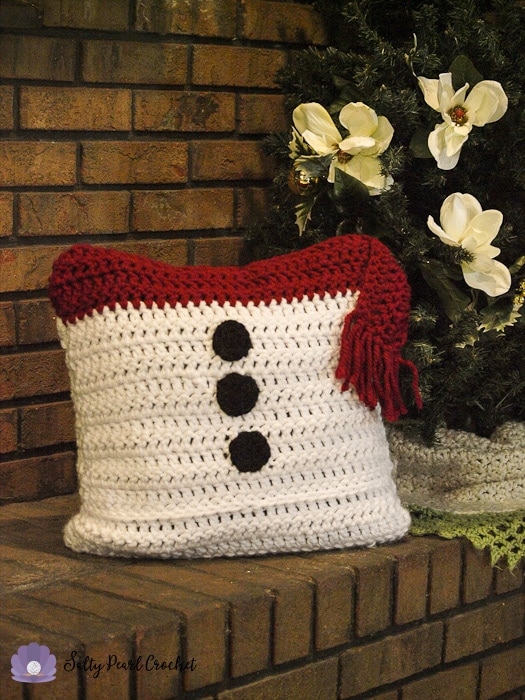
Now that we’ve had our Thanksgiving dinner, it’s officially Christmas season! Hooray! And that means I can share my latest pattern, this adorable Snowman Pillow Sham, with a clear conscience.
The free Santa Pillow Sham I shared with you all was such a huge hit with my kiddos that I had to immediately promise to make a second Christmas pillow. We all decided that a snowman should be the next design, and I am thrilled with how it came out! (Side note, spur of the moment ideas like this are the reason my yarn stash never shrinks! Anyone with me?)
You’ll need just two skeins of white chunky weight yarn to make the snowman, and either big black buttons or some scrap black yarn, but the scarf could be any color you please! I chose red simply because I already had some left over from a previous chunky yarn project.
This pillow case would be a great project for an adventurous beginner! You will need to know Back Post Double Crochet, and foundation double crochet, but beyond that, it’s all smooth sailing with double crochet! What a fun way to add some wintry cheer to your home this holiday season!
Be sure to Pin this pattern on Pinterest or add to your Ravelry Favorites so you don’t lose it! If you prefer to work offline, I’ve provided a convenient, Ad-free PDF for you to purchase on Ravelry.

Materials
M/9mm and L/8mm Crochet Hooks (or sizes needed to meet gauge)
I/5.5 Crochet Hook (for appliques)
Lion Brand Hometown USA Yarn (81 yds (6) Super Bulky weight yarn)
2 skeins New York White, 1 skein Tampa Spice
Black Scrap yarn. I used Red Heart with Love (4) Worsted weight yarn in Black.
Scissors
Yarn Needle for finishing
18” square pillow form.
Optional: 2 Large (about 1”) buttons for closure.
Abbreviations
Ch- Chain
Dc – double crochet
Fdc – foundation double crochet.
BPDc – back post double crochet (There’s a great tutorial on Moogly blog for post stitches!)
YO – yarn over
Special Stitches
Fdc – Ch 3. YO, insert hook into first chain and pull up a loop. Ch 1. YO, pull through 2 loops, YO, pull through remaining loops.
Gauge / Finished Size
4 Dc and 3 rows per 2”. Finished pillow case measures 17” square.
Pattern
Front Piece
With M hook and White yarn, Ch 34. Switch to L hook.
Row 1: Dc in 3rd ch and each ch across. [32]
Row 2-8: Ch 2, turn. Dc across. [32]
Row 9: Ch 2, BPDc in 3rd ch and each ch across. [32]
If you’re not yet comfortable with Back Post Double Crochet, feel free to leave it out entirely or work in the back loops only for this row to give just a smidge of texture. After all, this will be sitting on your couch, not mine. Make it your own unique creation! I won’t tell on you for not following directions.
Row 10-20: Ch 2, turn. Dc across. [32]
Join Red yarn.
Row 21: Ch 2, Dc across. FDc 8. [40]
Row 22-24: Ch 2, Dc across. [40]
Break yarn, and weave in ends.
Back Piece
With M hook and White yarn, Ch 34. Switch to L hook.
Row 1: Dc in 3rd ch and each ch across. [32]
Row 2-16: Ch 2, turn. Dc across. [32]
Join Red yarn.
Row 17: Ch 2, Dc across. [32]
Row 18-20: Ch 2, Dc across. [32]
Break yarn, and weave in ends.
Coal Buttons (Make 3)
With black yarn and I hook, ch2.
Round 1: 8 Hdc in 2nd ch. Sl to join.
Round 2: 2Hdc in each st. Sl to join.
Break yarn and fasten off, leaving a 12” tail to sew to the piece.
Finishing
Arrange the coal buttons on the front panel. I centered them vertically between the scarf and the ridge formed by the back post stitching. Use the yarn tails to sew the applique in place. Weave in and snip off the excess.
Next, place the back panel down, then arrange the front panel over it so the buttons are sandwiched inside. Fold up the bottom flap up and in to make the piece square.
Using your yarn needle and some scrap white yarn (about 3 times as long as the length you’re sewing), sew the side of the pillow case together. I used a mattress stitch, but the seam will be on the inside anyway, so no stressing over it! I found that starting at the bottom and sewing through 3 thicknesses (the flap, and the front and the back) worked easiest. Stop before you get to the red so your white yarn doesn’t show through! Repeat on the opposite side. Leave the bottom seam open- the extra flap will enclose the pillow.
Now, take a long piece of red yarn to sew the scarf portion shut across the top and down each side, making sure that the scarf is on the correct side! (I may or may not have had to undo mine to fix it. Alright, I did! But I fixed it, so all’s well that ends well!)
If you wish, attach a button or two to the outside of your envelope flap to help keep it snugged shut. Just push them through the fabric, no need for special buttonholes with such a chunky stitch!
Turn right side out, and stuff with your pillow form.
Cut several lengths of red yarn to make fringe for your Snowman’s scarf. Simply loop them through and pull taut, just as you’d do for a regular scarf. I like to use my crochet hook to thread them, then pull taut later.

Enjoy your new Christmas pillow with a warm mug of peppermint hot cocoa or spiced cider! When you’re done, I’d love to connect with you and see your finished projects! Join my mailing list and receive the first updates and even some special promos and discounts just for my subscribers, or you can follow me on:
Facebook: https://www.facebook.com/SaltyPearlCrochet/
Pinterest: https://www.pinterest.com/theSaltyPearl/
Instagram: https://www.instagram.com/SaltyPearlCrochet
Ravelry: https://www.ravelry.com/designers/katie-clary


Janine Stonehouse says
Looking at your Salty Pearl Crochet – Snowman Pillow Sham you mention BPDc in the front piece but don’t describe what this stitch is. Can you help?
Katie says
Hi Janine!
Sorry for the confusion! BPDc is an abbreviation for Back Post Double Crochet. It’s just to give a subtle raised line for texture. If you’re not comfortable trying it, working in the back loop for the row would work just fine, too. I put a note in the beginning of the post linking to this tutorial by Moogly on post stitches, but I’ll make a note in the abbreviations!
Thanks, and happy crocheting!
Katie
janet says
Please can i sign up for a newsletter please
Pam Register says
Hey I love this pattern and as a beginner this has been a great project.☺️ Thanks for sharing the pattern. I do have a question tho, the front has 24 rows total and the back has only 20 rows total. I am working on the back right now and it is considerably shorter. Am I missing something? 🤔
Katie says
Hi Pam!
You’re right, the back will be longer. That allows you to make a pocket to hide your pillow inside without seaming the bottom shut. I like to do that so I can wash the pillow case without getting the pillow wet.
Glad to hear you enjoy the pattern!
Katie
Pam Register says
Thank you! It makes sense now! 😜 I love the flap idea!