This post may contain affiliate links. For more details, see my disclosure page.
Several times a year, my local crochet club donates crochet blankets to several charities in our immediate area. This year, we took on a new charity- the local Veteran’s Hospital, so I wanted to find an easy crochet blanket pattern that was military themed.
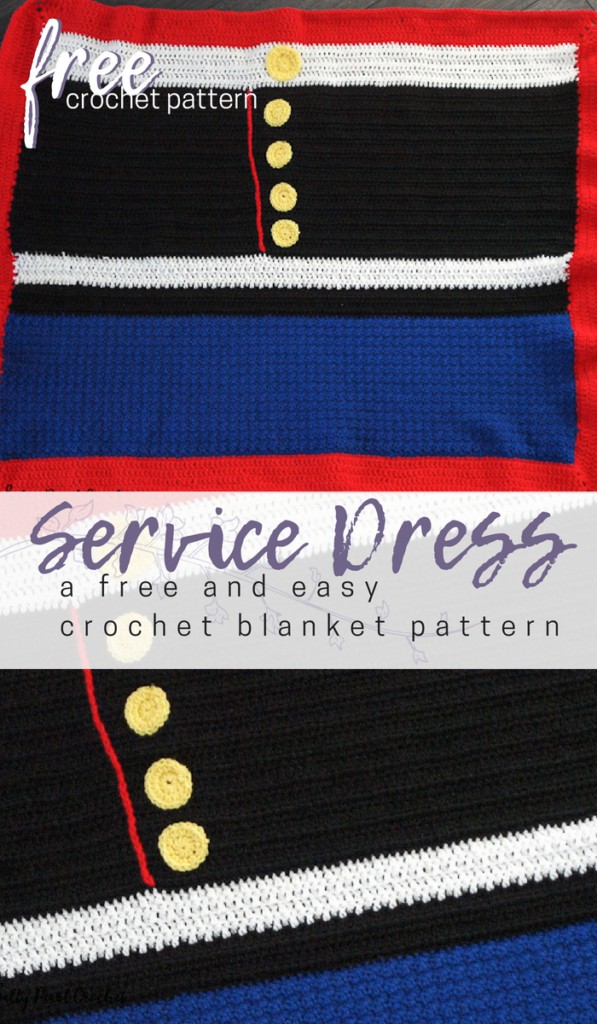
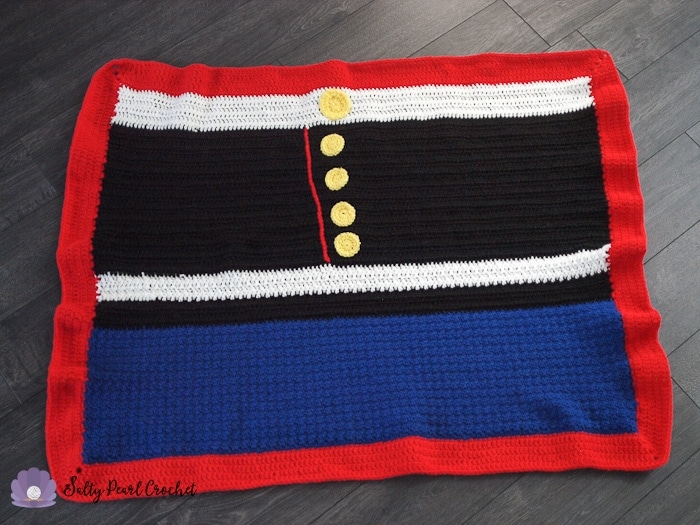
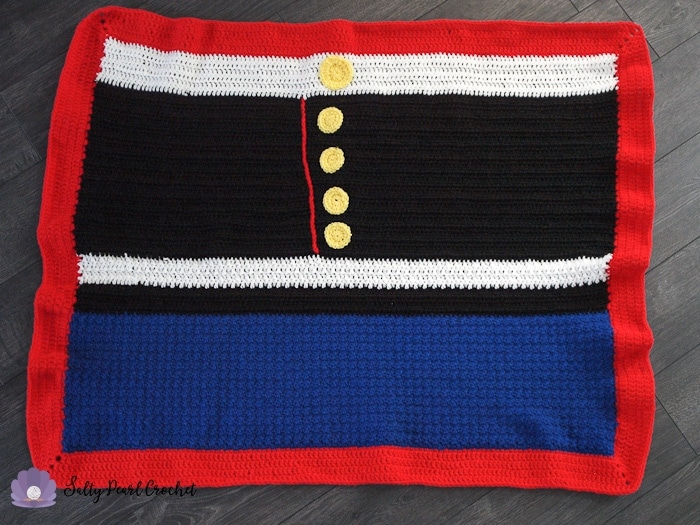
I couldn’t find a quick and easy crochet blanket pattern that suited my tastes, so instead I designed this cute lapghan pattern that I’m calling the Service Dress Blanket. The simple stitches and easy color blocking are just right for a beginner crochet blanket pattern, and it was a breeze to work up!
I designed this crochet blanket pattern to resemble the Marine Corps dress uniform, since my husband is a Marine. However, it could easily be adapted to look like several of the different military services, or even a police uniform if you’re clever with appliques!
Click Here to add this pattern to your Ravelry Favorites! Or, Pin this image on Pinterest:

Whether you’re working on a crochet baby blanket for a new military brat or a donation for your local VA hospital, this quick and easy blanket pattern is perfect for you!
Service Dress Blanket- an Easy Crochet Blanket Pattern for Beginners!
Materials
K 6.5mm CrochetHook
Red Heart Super Saver Yarn, Worsted (4) weight, 100% acrylic. 2 skeins Royal, 2 skeins black, 1 skein hot red, and 1 skein white
Stitch markers
Scissors
Yarn Needle
Abbreviations
Ch- chain
Sc- single crochet
Hdc – half double crochet
Ehdc- extended half double crochet
Dc – double crochet
Special Stitches
Ehd: Yarn over, insert hook into stitch indicated, yarn over and pull up a loop, yarn over and pull through one loop, yarn over and pull through 3 loops to complete stitch.
Gauge / Finished Size
12 stitches and 8 rows dc in 4”
Begin With Blue Yarn and Suzette Stitch
Ch 120.
Row 1: (Sc, dc) in 2nd ch from hook. *Skip 1, (sc, dc) in next ch.* Repeat * to * across. [120]
Row 2: Ch 1, turn. *Skip 1, (sc, dc) in next sc.* Repeat * to * across. [120]
Repeat Row 2 (13 more) times, or until piece measures 10”.
Fasten off and weave in ends.
Change to Black Yarn and Extended Half Double Crochet Stitch
With black yarn, join with a slip stitch to the first stitch of the previous row.
Row 3: Ch 2, ehdc into same st and each st across. [120]
Row 4: Ch 2, turn, ehdc into same st and each st across. [120]
Repeat Row 4 (2 more) times, or until the black section measures 2”.
Fasten off and weave in ends.
Change to White Yarn and Front/Back Loop Stitch
With white yarn, join with a slip stitch to the first stitch of the previous row.
Row 5: Ch 2, dc in front loop of same st, dc in back loop of next st, *dc in front loop of next st, dc in back loop of next st,* repeat * to * across. [120]
Row 6: Ch 2, turn, dc in front loop of same st, dc in back loop of next st, *dc in front loop of next st, dc in back loop of next st,* repeat * to * across. [120]
Repeat Row 6 (2 more) times, or until white section measures 2”.
Fasten off and weave in ends.
Change Back to Black Yarn and EHDC
With black yarn, join with a slip stitch to the first stitch of the previous row.
Repeat Row 3. [120]
Repeat Row 4 (23 more) times, or until the black section measures 12”.
Fasten off and weave in ends.
Change to White Yarn and Double Crochet
With white yarn, join with a slip stitch to the first stitch of the previous row.
Row 7: Ch 2, dc in same st and each st across. [120]
Row 8: Ch 2, turn, dc each st across. [120]
Repeat Row 8 (4 more) times, or until white section measures 3”.
Fasten off and weave in ends.
Change to Red Yarn for Border
With red yarn, join with a slip stitch to any stitch on the bottom of the black section.
Round 1: ch 1, sc in same st and each st across, (sc, ch 2, sc) in the corner, work 2sc in the side of each row up the side, (sc, ch2, sc in the corner, sc in each st across the top, (sc, ch 2, sc in the corner, work 2sc in each row down the side, (sc, ch2, sc) in the corner, sc in each st across the bottom, join with a sl.
Round 2: ch 2, dc in same st, and each st across the bottom, (dc, ch 2, dc) in the corner, dc in each st up the side of the piece, (dc, ch 2, dc) in the next corner, dc in each st across the top, (dc, ch 2, dc) in the corner, dc in each st down the opposite side of the piece, (dc, ch 2, dc in the next corner, dc in each st across the bottom, join with a sl to your first st.
Rounds3-5:Repeat Round 2.
Fasten off and weave in ends.
Make Buttons in Yellow
Make 4 small buttons. With yellow yarn start a magic circle.
Round 1: Ch 1, make 10 hdc into magic circle, sl to join. [10 hdc]
Round 2: Ch 1, work 2 hdc in same st and each st around, sl to join. [20 hdc]
Fasten off, leaving an 18” tail to sew button to blanket.
Make 1 larger button. With yellow yarn, start a magic circle.
Round1: Ch 2, make 12 dc into magic circle, sl to join. [12 dc]
Round2: Ch 2, work 2 dc in same st and each st around, sl to join. [24 dc]
Fasten off, leaving an 18” tail to sew button to blanket.
Finishing
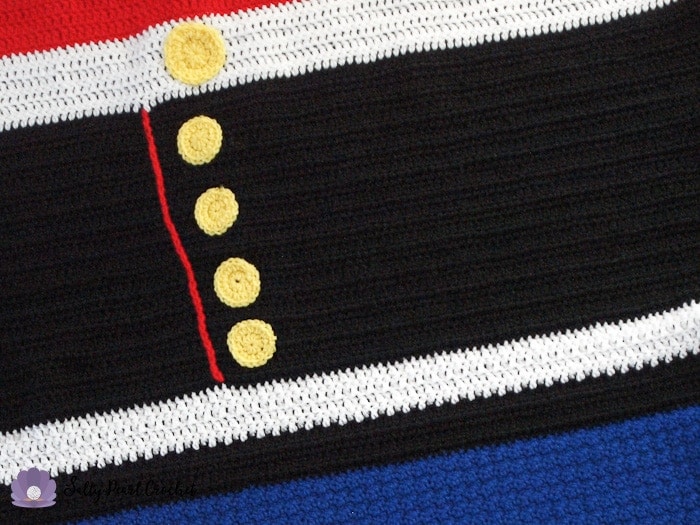
With red yarn, surface slip stitch a vertical line up the front of the upper (taller) black section 2” left of center.
Sew the big button centered in the upper white section and sew the smaller buttons in a vertical line below the big button, evenly spacing them through the upper black section.
Wash and Block as desired.
Thank you so much for supporting Salty Pearl Crochet! Please let me know if you have any questions or would like additional information about the pattern. I love seeing your creations on Ravelry or Instagram (#SaltyPearlCrochet), and I am always happy to offer pattern support for all of my crochet patterns as written.
You are more than welcome to sell any finished items made from this pattern. Please use your own photos and credit Katie Clary as the designer. Links back to my blog post are greatly appreciated! Please feel free to share this pattern by directing others to this blog post or the Ravelry listing, NOT by distributing the pattern or photos as your own.
Want to connect? Join the Salty Pearl Crochet Circle so we can crochet together on Facebook. I would love to crochet along with you! Join my mailing list and receive the first updates and even some special promos and discounts in my newsletter, or you can follow me on:
Facebook: https://www.facebook.com/SaltyPearlCrochet/
Pinterest: https://www.pinterest.com/theSaltyPearl/
Instagram: https://www.instagram.com/SaltyPearlCrochet


susanne shumate says
I WI SH I COULD TELL YOU HOW EXCITED I WAS WHEN I WAS BROWSING THROUGH YOUR BLOG LOOKING FOR INSPIRATION OR JUST A COOL PATTERN AND FOUND THIS> WAS RAISED IN THE MARINE CORP MY DADDY WAS IN FOR YEARS MY DADDY IS MY HERO SO ITS NO WONDER I MARRIED A MARINE> I WANT TO MAKE THIS FOR BOTH OF THEM> THANK YOU SO MUCH FOR THE HARD WORK YOU PUT INTO DESIGNING IT!!!