This post may contain affiliate links. For more details, see my disclosure page.
If you’ve been crocheting for more than a day or two, you’ll certainly have some scrap yarn around. Did you know that you can use a piece of scrap yarn as a stitch marker? I’m always looking for clever ways to use yarn to make my life (and my crochet projects!) go just a bit easier, and today’s tip certainly fits the bill.
One of my biggest frustrations during crochet is losing count. (Second only to weaving in ends!) While I do find repetitive counting soothing at times (I’m a musician at heart), even I can tire of the tedious counting at times. Plus, with noisy children and dogs playing all day and a major construction project on our block (not to mention an awesome but LOUD neighbor), sometimes the noise just crowds out my ability to keep count!
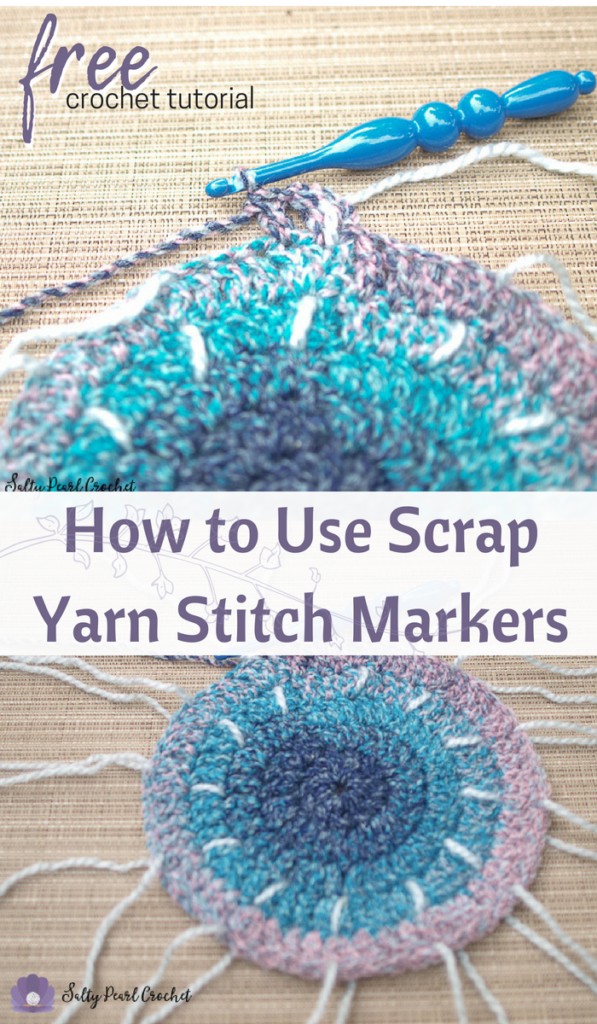
So, when I started a simple circular car seat blanket for my new niece or nephew, I knew I’d need a bit of extra help! Here’s how you can use simple scrap yarn as running stitch markers so you won’t have to count a thing for this entire blanket!
Be sure to Pin this Tutorial for Later!
Materials Needed
Disclosure: this page contains affiliate links. If you purchase after clicking my link, I may receive a small commission at no extra cost to you. Thank you for supporting the tutorials and patterns offered at Salty Pearl Crochet!
12 strands of scrap yarn, at least 6 inches long. I prefer longer 1-2 foot long segments for a baby blanket so they can span almost the whole project.
1 Skein Loops and Threads Barcelona BIG! Yarn
K 6.5mm Crochet Hook (Yarnology from Hobby Lobby is a nice affordable ergonomic brand!)
Using A Running Scrap Yarn Stitch Marker
First, you’ll start with a magic circle.
Chain two, and place 12 dc into the circle, then cinch tight and join in the round with a slip stitch. [12 dc]
For round two, you’ll chain two, and place 2 dc in each stitch around. [24 dc] Remember to work in those tails! This is a no yarn needle, no counting project!
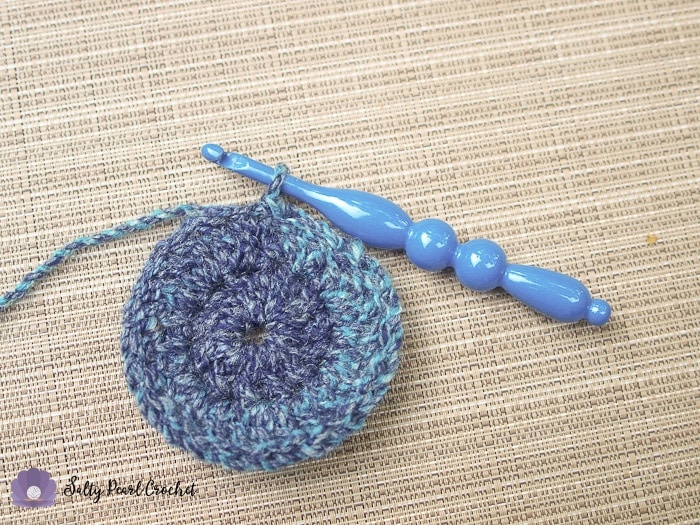
Side note- don’t you love this cute ergonomic crochet hook? It’s a Yarnology hook from Hobby Lobby. These hooks make crocheting so comfortable- and I’m going to continue using them until I can afford a Furl’s Candy Shop Hook set. (Santa, are you listening?)
On Round Three, you’ll start placing your stitch markers. Chain two and place a strand of yarn under the neck of your crochet hook. Then, work 2dc in the first stitch, and one dc in the next.
Place a strand of yarn under the neck of the crochet hook, and then place 2 dc in the next stitch, and 1 dc in the next. Repeat this process around the circle, joining with a slip stitch. [36 dc]
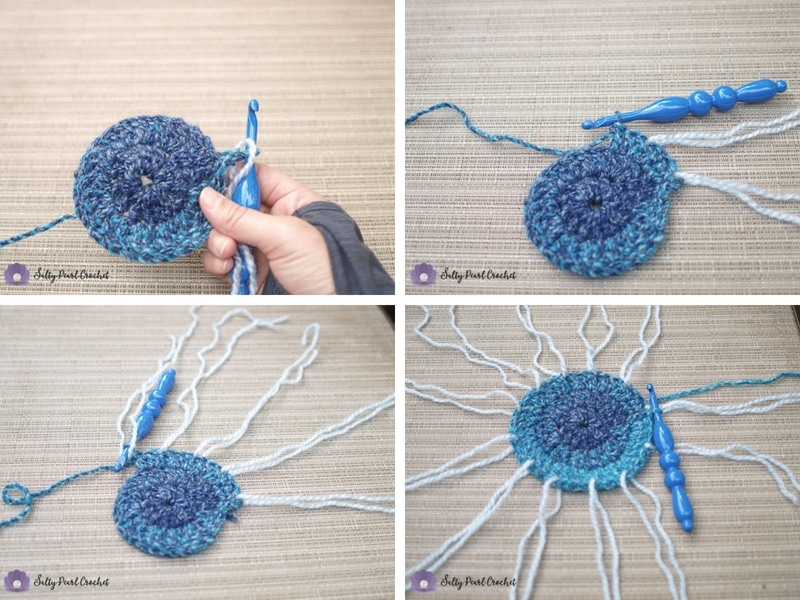
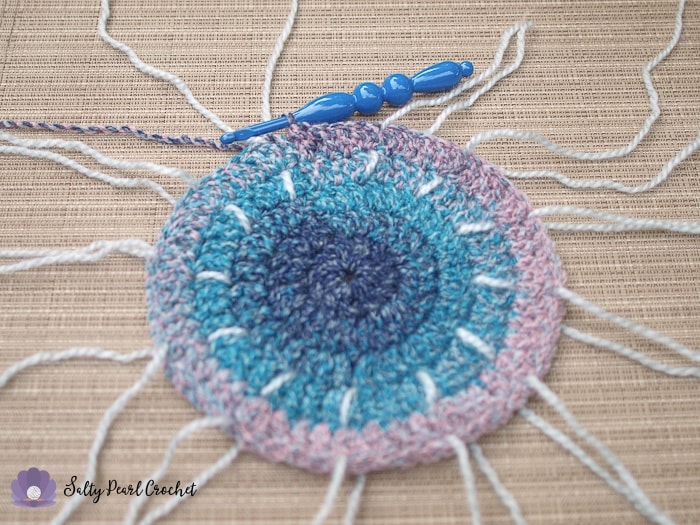
As you can see above, you’ll have 12 stitch markers at the end of the round, marking the first stitch in each increase.
For the next row, you won’t need to do any counting! After you make your turning chain,pull one strand of yarn against the neck of your crochet hook, just under the working loop. Then work a 2dc increase into the marked stitch, and place one double crochet in each of the unmarked stitches. Join with a slip stitch. [48 dc]
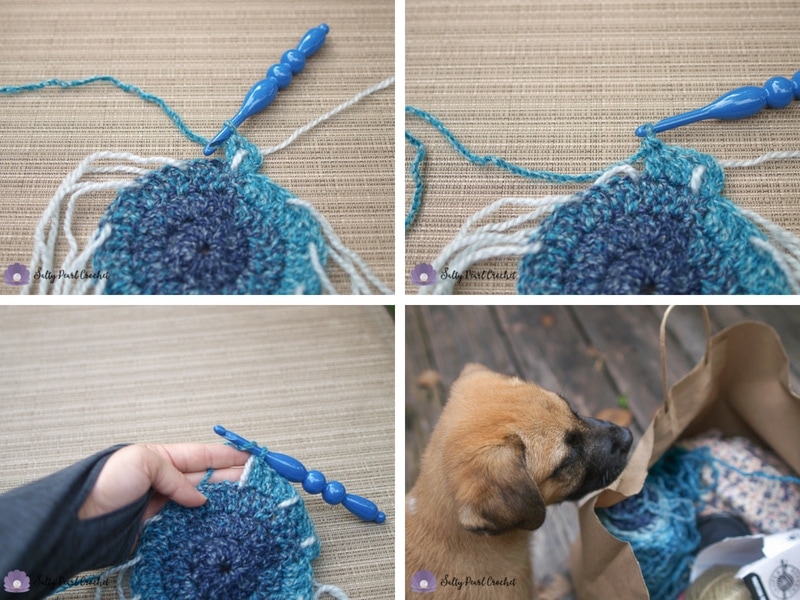
This crochet hack is so useful that I even had plenty of time to pet my new puppy, Scout. I know we’ll be great friends because he’s more interested in pets than stealing my yarn. I even crochet with him snuggled on my lap like a kitty! Isn’t he the cutest!?
But back to our regularly scheduled yarn programming!
Round 5 simply follows this simple pattern. Make your turning chain first. Then, weave the strand of scrap yarn back under the neck of your hook, and increase in the marked stitch. Work one double crochet in each unmarked stitch. Continue around, and slip to join. [60 dc]
You’ll notice that by this method, you’re effortlessly increasing by 12 stitches in each round. You’ll work one more stitch in between rounds as the rounds increase. In fact you can figure out how many stitches you should have between markers by simply counting rounds- you’ll have 5 stitches times 12 for round 5.
On Round 6, I realized my one BIG ball of yarn (a clearance score!) might not make quite as big of a blanket as I’d like, so I decided to do some filet crochet. If you want to use a simple lace pattern (dc, ch 1, sk 1), that fits quite nicely on even rounds. It won’t work as neatly, on odd rounds. So, since I was avoiding counting, I just alternated rounds.
To increase in the filet crochet lace, you simply move your stitch marker under the neck of the yarn, make one double crochet into the marked stitch, and chain one and DO NOT skip a stitch. Then, for your unmarked stitches, continue in pattern: *dc in next st, ch 1, sk 1 st.* Make sure that at every stitch marker, you move the yarn up, and work the dc, ch 1 without skipping a stitch. Continue in this pattern around, and slip to the first stitch to join. [36 dc, 36 ch 1 sp]
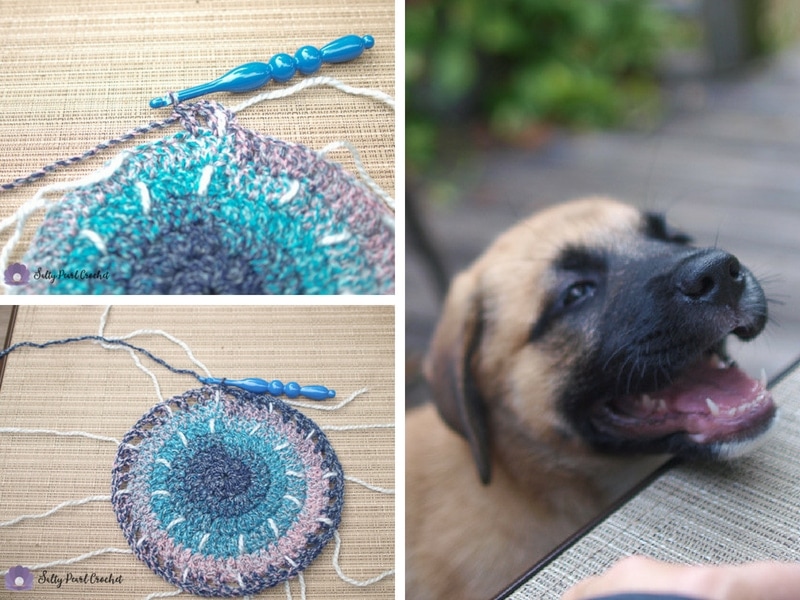
Now, you just might have gotten terribly distracted by my adorable new puppy. But really, that’s the beauty of using scrap yarn stitch markers! It’s okay to get distracted. You have a direct line of thought clearly visible on your work. No fuss! No forgetting! And plenty of time to enjoy the little things in life- because they only stay little for so long.
For Round 7, we’re back to the same pattern of moving up the stitch marker and increasing in marked stitches, and making a solo double crochet in each unmarked stitch- including the chains. [84 dc]
For the rest of the blanket, I simply alternated Rounds 6 and 7 until I was running short on yarn, then finished off. Your stitch counts will increase by 12 stitches each round. I could math them out for you, but that defeats the purpose of using 12 stitch markers, doesn’t it?
After you run out of yarn, voila! A super cute baby blanket you can gift as a car seat blanket or stroller blanket, with absolutely no bad juju woven into the stitches! No stopping to recount again, no ripping out four rounds because I missed an increase who knows where, and no yelling at my kids for being so loud that I can’t even think, much less count to seven. Just fun, relaxing stitching.
This technique would be fantastic for marking rounds in amigurumi, as well! I always lose track of the ends when I’m working in seamless rounds. Let me know in the comments- where will you use this technique?
Thank you so much for supporting Salty Pearl Crochet! Please comment to let me know if you have any questions or would like additional information about the pattern. I love seeing your creations on Ravelry or Instagram (#SaltyPearlCrochet), and I am always happy to offer pattern support for all of my crochet patterns as written.
You are more than welcome to sell any finished items made from this pattern. Please use your own photos and credit Katie Clary as the designer. Links back to my blog post are greatly appreciated! Please feel free to share this pattern by directing others to this blog post or the Ravelry listing, NOT by distributing the pattern or photos as your own.
Want to connect? Join the Salty Pearl Crochet Circle so we can crochet together on Facebook. I would love to crochet along with you! Join my mailing list and receive the first updates and even some special promos and discounts in my newsletter, or you can follow me on:
Facebook: https://www.facebook.com/SaltyPearlCrochet/
Pinterest: https://www.pinterest.com/theSaltyPearl/
Instagram: https://www.instagram.com/SaltyPearlCrochet

Julie Masters says
Your puppy is adorable. And distracting. But this looks like a great method to keep track of stitches without counting continuously. Love your blog, love your patterns, love your sense of humor!! Keep up the great work!