This post may contain affiliate links. For more details, see my disclosure page.
How to Crochet the 3rd Loop Double Crochet Stitch
Hey there, Friends! This week, I have a tutorial for the 3rd Loop Double Crochet Stitch included in a free easy crochet scarf pattern I designed for Crochet Therapy. When I heard that Andrea was doing a series on crochet and happiness, I knew I had to write about my Tide Lines Scarf for her because I had such a positive story behind it. You can read the full story (and grab the FREE crochet scarf pattern!) over at her blog here, but the long and short of it is that I used crochet to help me turn around a really stressful day!
Add it to your Ravelry Favorites Here, or sign up for my newsletter below to get the PDF download of this tutorial AND the Tide Lines free crochet scarf pattern!
Disclosure: This post contains affiliate links. When you shop through my links, you get the same great price, and I may get a small commission for recommending the products I use and love. Thanks for supporting my blog so I can continue to provide you with FREE patterns and tutorials!
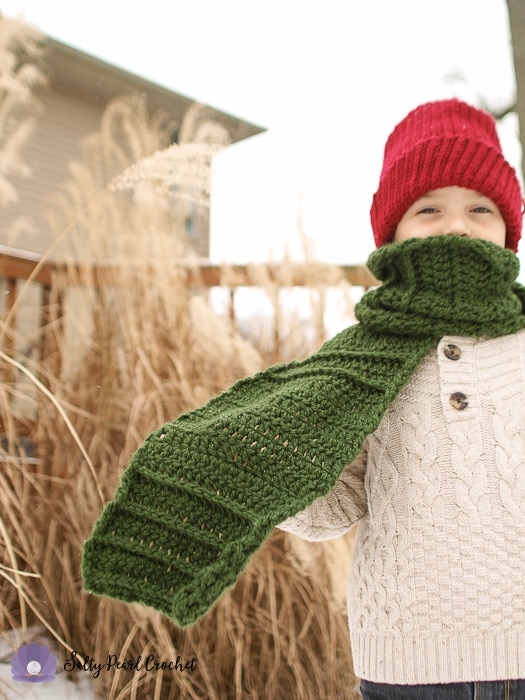
I love it when I can use a really simple crochet stitch to make a huge design change. One of the BEST ways to do that, in my opinion, is by crocheting into the 3rd loop to create a ridged line of stitches that look very similar to knit. I’ve used those third loop double crochet stitches in my Tide Lines Scarf to achieve the raised “lines” that give this scarf its architectural interest.
The 3rd Loop Double Crochet stitch makes such a great addition to basic patterns like this. Honestly, without the rows worked into the third loop, the scarf is entirely double crochet! Isn’t it great to find easy crochet projects that still look great? This one was PERFECT for crocheting while traveling- in fact, I finished the entire scarf, from the initial chain to weaving in the ends, between the time we arrived at the airport in St. Petersburg, Florida, and the time we disembarked in Bloomington, Illinois. The flight attendants were pretty impressed when my son walked off wearing his new scarf!
I know that with just a little patience, even a beginner can master the Third Loop Double Crochet Stitch! Here’s what you’ll need to get started:
Materials for Crocheting the Third Loop Double Crochet Stitch:
My Tide Lines Scarf calls for Loops and Threads Charisma yarn, which is a Bulky (#5) weight yarn. I used a nice Light Gray Color (which seems to be currently out of stock!) for this stitch tutorial.
I’m using a Yarnology ergonomic K (6.5 mm) crochet hook.
Feel free to substitute the yarn and hook of your choice! This crochet technique is so versatile.
Abbreviations
Ch: chain
Dc: double crochet
Lp: loop
St: stitch
3rd Loop Double Crochet Stitch Instructions:
Begin with a chain as long as you would like your project to be, then add 2 more for a turning chain. (Note: I don’t count my turning chain as a stitch.) For my Tide Lines Scarf Pattern, I chained 22, but for this stitch tutorial I only chained 10.
Row 1 [right side]: Dc in 3rd ch and across. Ch 2, turn.
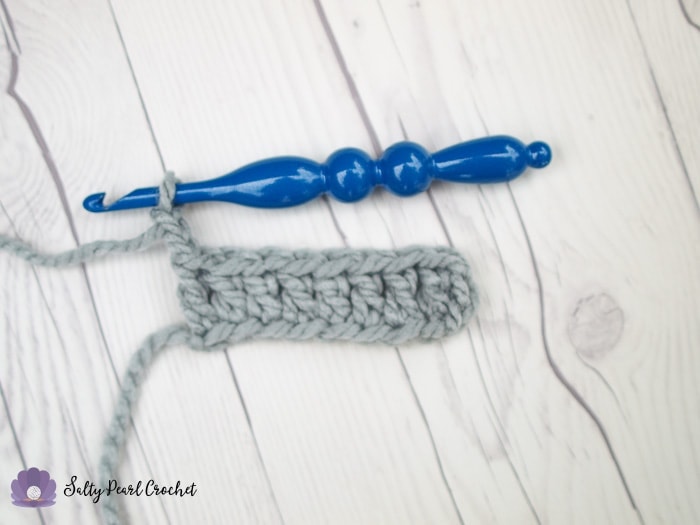
Below, you can see my completed row 1 of double crochet stitches, plus my turning chain.
Then, turn your work to see the row you’ll be working in next.
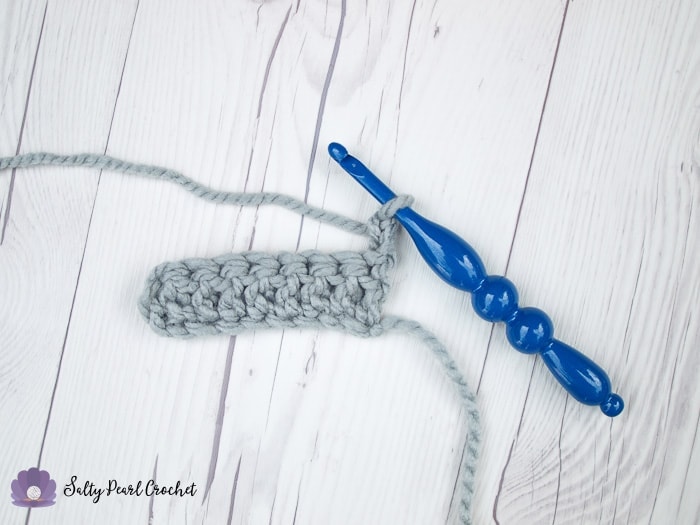
Normally, you’d nestle your hook right underneath the top loops of the stitch. If you look just below that, (on the wrong side of your work) there will be another loop of yarn there. (You can also find this 3rd loop on a Half Double Crochet stitch! It comes from the yarn over.) For this next row, we’ll be working through these back loops, which are underneath the space you normally put your stitch.
You’ll want to insert your hook in that third loop from bottom to top.
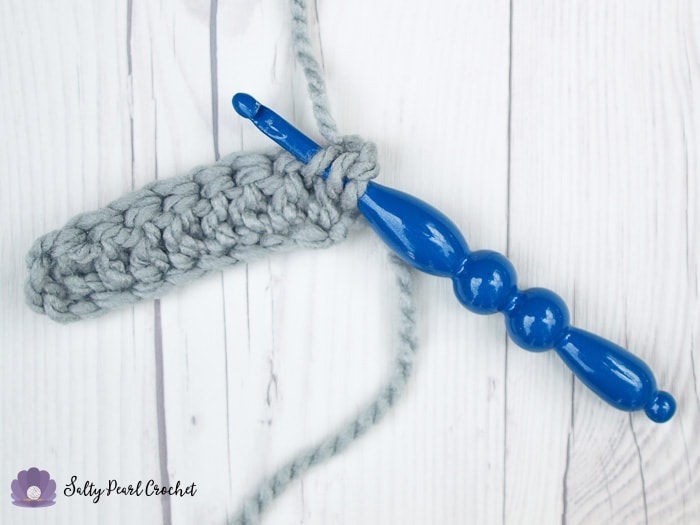
Yarn over and pull up a loop:
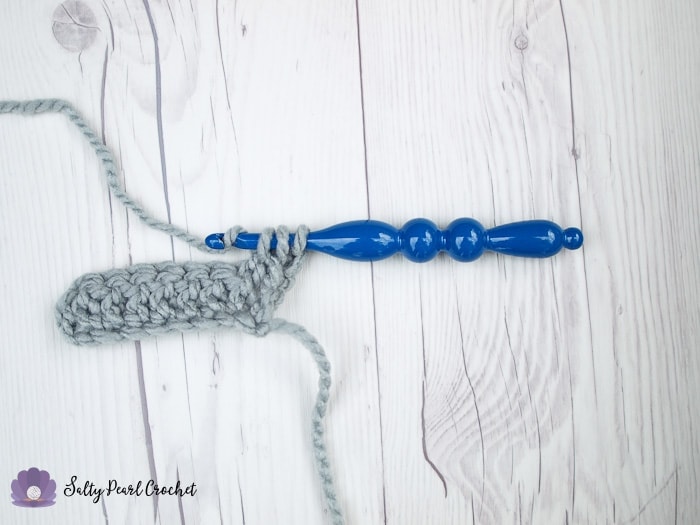
And then you can complete your stitch as usual.
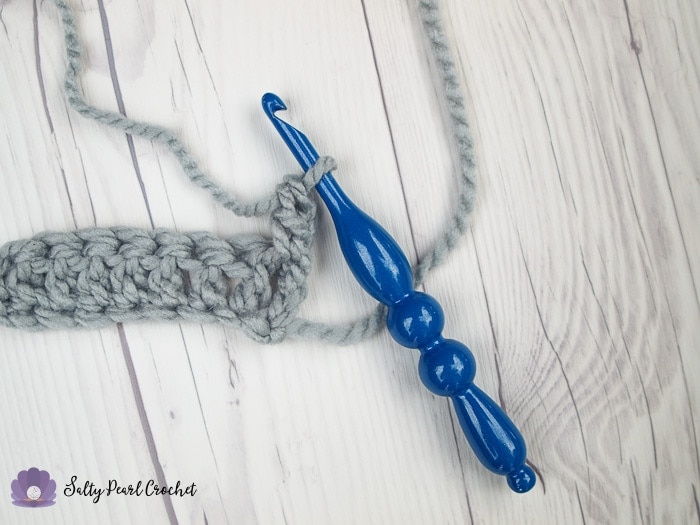
Continue across the row, and when you turn your work, you’ll be able to see the “V” stitches of the previous row in a neat raised ridge.
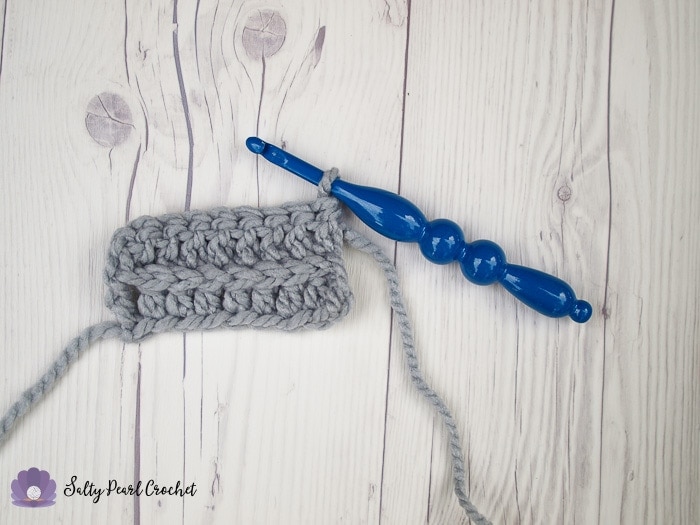
Repeat Rows 2 and 3 until your piece has reached the desired height.
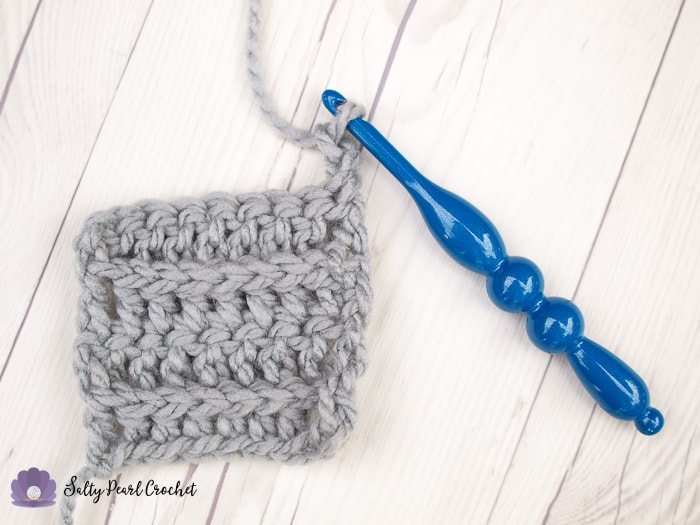
And you’re done! I like experimenting with 3rd Loop Double Crochet stitching to create texture and interest in my crochet projects. You could even use it to imitate a 1×3 knit ribbing.
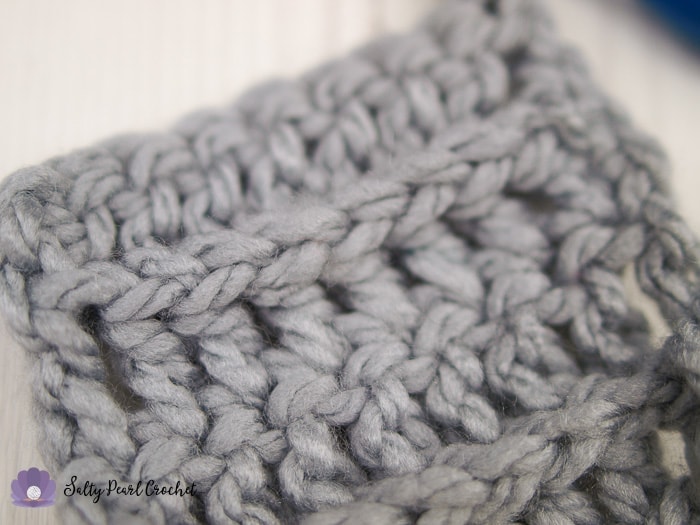
Don’t these ridges really POP right off your work? I love how they look like little knit stitches, and the texture is so interesting, for a very minimal change in technique. Plus, this yarn (Loops and Threads Charisma) is just SO squishably soft!
Want to try out the Third Loop Double Crochet Stitch? Hop over to Andrea’s Blog to read about my Tide Lines Scarf and make the free pattern, or if you’d like a convenient PDF download of this tutorial AND the Tide Lines Scarf, subscribe to my newsletter and I’ll email it to you as a gift!
Looking for the supplies featured in this stitch tutorial?
Here’s where you can find them!
Loops and Threads Charisma yarn
Yarnology ergonomic K (6.5 mm) Crochet Hook
I hope you’ve enjoyed trying the 3rd loop double crochet stitch. Will you use it to make the Tide Lines Scarf, or in a different project? I’d love to see! Please share your WIPs and Finished Projects with me on the Salty Pearl Crochet Facebook Page or tag me on Instagram with the hashtag #saltypearlcrochet.
Want to connect? I would love to crochet along with you! Join my mailing list and receive the first updates and even some special promos and discounts in my newsletter, or you can follow me on:
Facebook: https://www.facebook.com/SaltyPearlCrochet/
Pinterest: https://www.pinterest.com/theSaltyPearl/
Instagram: https://www.instagram.com/SaltyPearlCrochet


Leave a Reply