This post may contain affiliate links. For more details, see my disclosure page.
Free Textured Crochet Hat Pattern
This past week, as I shared my Sunrise Sky Mesh Summer Cowl, I had a crochet friend kindly inform me that the northern half of the continent is under snow. Of course, I think it’s been cold lately, too! (I was as chilly as 39 when I woke up last Thursday! Brr!) So, I told her that I would design her a beanie to crochet to keep her warm! This free textured crochet hat pattern is the result of that fun conversation!
Add this Pattern to your Ravelry Favorites Here!
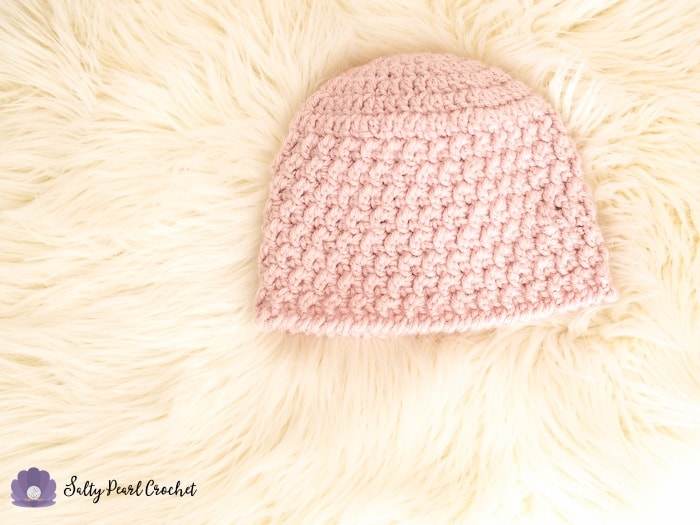
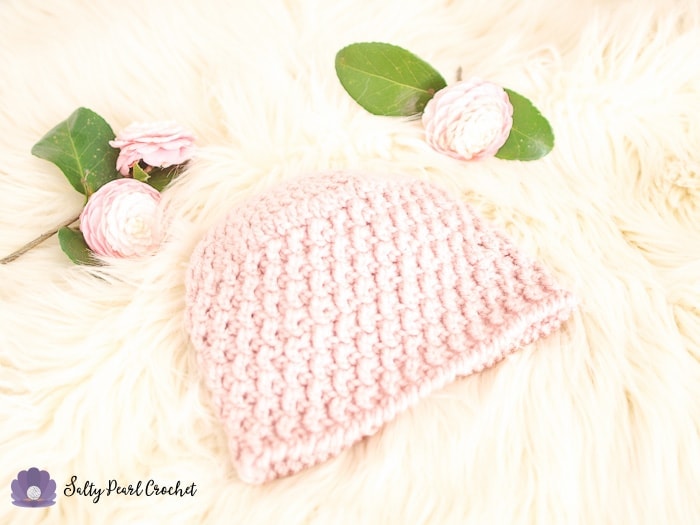
For whatever reason, my daughter did NOT want to model today, so I was limited to flat lay photography for this project. I started with the image above, but thought it needed just a little more interest. I couldn’t decide what to use, until I realized that my friends up North would probably LOVE to see the beautiful early blooms I have out in my front yard.
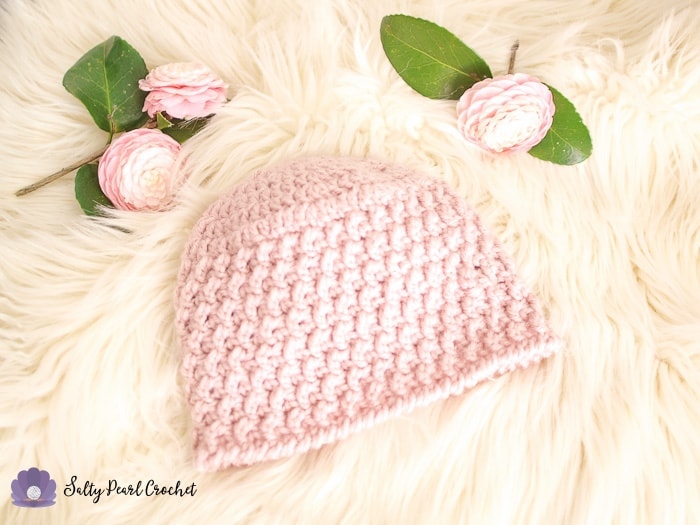
Doesn’t the color match my camellias perfectly? Believe it or not, down here in Florida, these are late blooms. I think they still brighten up the scene! I decided to name this beanie after these flowers. A textured crochet hat pattern to tide you over until your “First Blooms” appear, if you will.
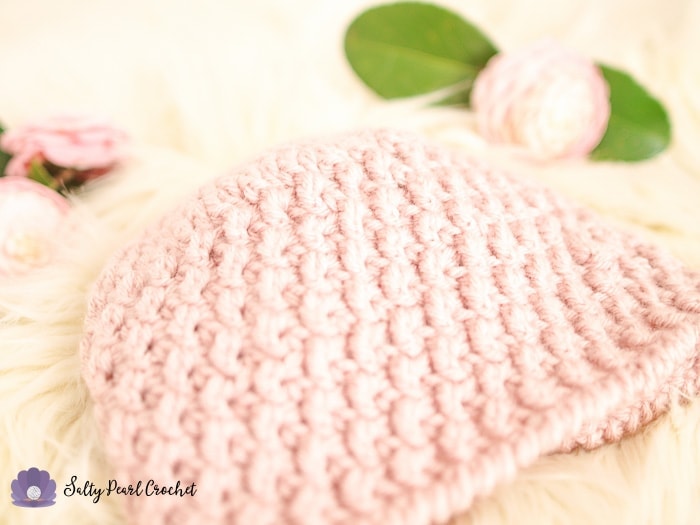
I am in love with this texture! Just a simple skipped stitch turns this pattern into a one row, two stitch repeat. The post stitches really add a lot of texture, and those little air pockets will help this hat hold onto warmth very well. (And look great!)
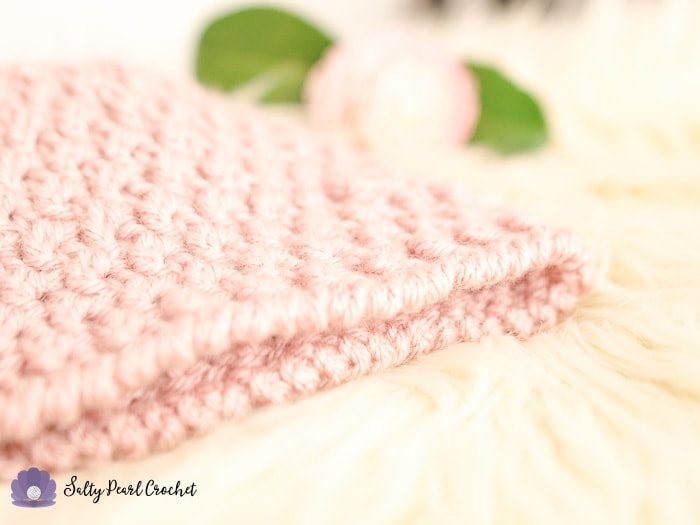
Since the body is made of post stitching, I thought a ribbed brim might just look like a break in the lovely pattern. So, I used a crab stitch to border it instead!
I hope you enjoy crocheting this textured hat pattern as much as I enjoyed designing it!
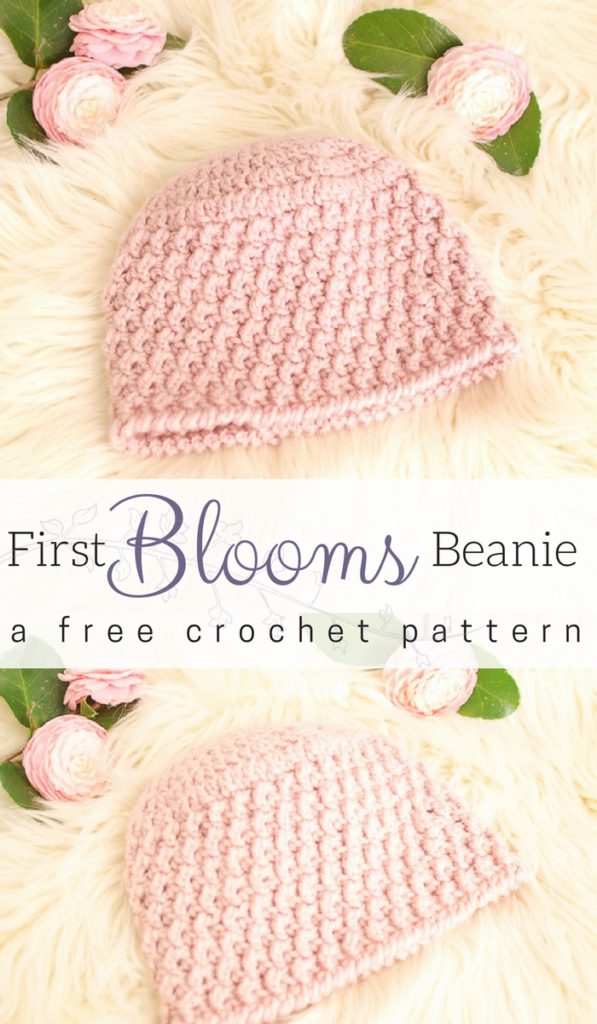
Before you start this pattern, add it to your Ravelry Favorites, or Pin this image on Pinterest!
Materials
I/9 5.5 mm Crochet Hook
Hobby Lobby I Love This Yarn! in Rosy Cheeks (or approx. 100(120, 150) yards worsted (4) yarn)
Scissors
Yarn Needle
Abbreviations
Bpdc – back post double crochet
Ch- chain
Dc – double crochet
Fpdc – front post double crochet
Sk – skip
Sl – slip
St -stitch
Special Stitches
Crab stitch / reverse single crochet: insert hook into stitch behind current stitch. Yarn over and pull up a loop, then yarn over and complete the stitch. Here’s a great Video tutorial.
Front and Back Post Double Crochet – my friend Nicki has an excellent video tutorial page HERE where you can learn the post stitches.
Psst! Hate Weaving in Ends?
Me too. Check out my Locked Loop Method for weaving in your initial yarn tail as you go! I save SO much time on my hats this way.
Gauge / Finished Size
7 dc and 4 rows per 2”
Hat Written for Baby(Child, Adult M) sizes, to fit a 15″(19″, 22″) Head.
Having trouble getting the perfect size? Check out my Flat Circle Hat Sizing Method post here, or sign up to get my Hat Size Checker printable in the box below.
First Blooms Textured Crochet Beanie Pattern
Round 1: Ch 2. 10 Dc into magic loop, sl to join. [10]
Round 2: Ch 2. 2 Dc in each st around, sl to join. [20]
Round 3: Ch 2. *2 Dc in next st, dc in next st.* Sl to join. [30]
Round 4: Ch 2. *2 Dc in next st, dc in next 2 sts.* Sl to join. [40]
Round 5: Ch 2. *2 Dc in next st, dc in next 3 sts.* Sl to join. [50] Baby size, skip to Round 8.
Round 6: Ch 2. *2 Dc in next st, dc in next 4 sts.* Sl to join. [60] Child size, skip to Round 8.
Round 7: Ch 2. *2 Dc in next st, dc in next 5 sts.* Sl to join. [70]
Round 8: Ch 2. Sk 1. *Bpdc, fpdc.* continue around until 1 st remains, Bpdc. Fpdc in sk st. Sl to join. [50 (60, 70)]
Repeat round 8 for 5 (7, 10) rounds.
Edging: Ch 1, crab st around. Sl to join. [50 (60, 70)]
Finishing: Break yarn and weave in ends securely.

Thank you so much for supporting my blog. I have checked and double-checked this pattern, but I’m only human- please let me know if you have any questions or if I have missed anything at all so I can correct it for you all.
You are more than welcome to sell any finished items made from this pattern. Please use your own photos and credit Katie Clary as the designer. Links back to my blog post are greatly appreciated! Please feel free to share this pattern by directing others to this blog post or the Ravelry listing, NOT by distributing the pattern or photos as your own.
Want to connect? I would love to crochet along with you! Join my mailing list and receive the first updates and even some special promos and discounts in my newsletter, or you can follow me on:
Facebook: https://www.facebook.com/SaltyPearlCrochet/
Pinterest: https://www.pinterest.com/theSaltyPearl/
Instagram: https://www.instagram.com/SaltyPearlCrochet
Ravelry: https://www.ravelry.com/designers/Katie-Clary

Debra Harrah says
I found this pattern and love the way it looks. So I am giving it a try. However I’M a little confused. When I get to row 8, I am not sure if the BPDC and the FPDC are done in the same stitch, or if BPDC is done in one stitch and the FPDC done in the next stitch? And then the next row, are the st he’s done in the skipped stitch from the row below?
Thanks very much for the help.
Katie says
Hey there Debra! For this beanie, the top is a flat circle, and then the front and back post stitches are done in individual stitches. There shouldn’t be any skipped stitches. Hope that helps! Please reach out if you have more questions.
Katie
Megan says
Hello Katie, I think there is a mistake after Round 2. Wouldn’t you need to do a round of Ch 2 *2Dc in next stitch, Dc in next stitch*, then Sl to join, in order to get 30 stitches? I also have a question about the end of round 8, where it says to Fpdc in sk st.. Since I skipped the stich, there is no post there to do the
Fpdc around. Am I supposed to work the Fpdc around the stitch in the prevous row that is under the skipped stitch? Would appreciate it if you could explain that part to me.
Thanks–
Megan
Katie says
Hi Megan!
You’re totally right about round 3! It’s funny how even my testers and I missed that! Total brain fart- I’ve corrected the pattern here already.
For the end of Round 8, you’re still working around the post of the skipped stitch from the previous round, Round 7. So, Your round begins in stitch 2, and you’ll work all the way around to the 70th stitch, then work the very last stitch into stitch number 1, to make a complete round. Does that make more sense?
Hope it helps!
Katie
Donna says
I don’t see on the pattern where it shows the size or sizes for the hat. Can you tell me what size the hat is.
Thank you Donna
Katie says
Hi there, Donna! I have updated it to reflect the sizing- It’s sized for Baby (Child, Adult M), to fit a 15″ baby’s head, 19″ child head, or 22″ adult head. Hope that helps!
You may also like the hat size checker download I have if you’re looking to make this hat in a different size! I’ve added a signup form and link to my hat sizing tutorial in the post above, just near the sizing information.
Thanks for bringing that to my attention!
Katie
Kayleen says
Thank you for this gorgeous little hat I just made one for a lady leaving work to have a baby girl it is so cute. I did it in size 3-6 by using your hat sizing
Katie says
So glad you enjoyed crocheting one! Thanks for stopping to let me know!
Happy crocheting,
Katie
Marilyn says
Hi Katie. HELP!! I have a question. On round 8, how many loops do you have on your hook before you do the last yarn over? I will phrase it a different way, do you do a yarn over for the BPDC and then another yarn over for the FPDC, then one last yarn over & through all 5 loops on hook All in the same stitch? Hope this makes sense.
Thanks,
Marilyn
Katie says
Hi Marilyn!
For Round 8, you will be skipping the first stitch (to come back to later!), then working one post stitch in each stitch around. There shouldn’t ever be more than 3 loops on your hook, because you’ll be completing each stitch individually. Sorry if that was unclear in the pattern. Hope that helps and you’re breezing through the rest of the pattern.
Katie
Jodi says
Hi. Unfortunately the cute design starting on row 8 showed up on the underside/ wrong side. Finally gave up. 😭
Katie says
Hi Jodi,
Sorry you felt frustrated! This design should be fairly reversible after a row or two. I encourage you to try again, or reach out if you have more specific questions! You can always email me at katie at saltypearlcrochet.com.
Katie
Anne says
Just checking….should it be bpdc onto (stacked) on top of bpdc?
Katie says
Hi Anne, for this pattern, you should be skipping the first stitch, which will make the stitches offset- your bpdc will be into the fpdc, and vice versa. That creates the alternating texture. If you were to stack the stitches, bpdc into bpdc, and fpdc into fpdc, you’d create vertical ribbing, which is pretty, but not the look we’re going for here.
Hope that helps!
Katie
Janelle says
Confused on Row 8. It says to FPDC in skipped stitch, then slip stitch to join. Since the skipped stitch is the first stitch of the row, shouldn’t you slip stitch first to end the row.
Janelle says
Please disregard my last comment. I I figured it out, and it’s genius! The join is virtually invisible doing it that way.
Katie says
YAY Janelle, so glad you figured it out and love it! I really hate the look of seams too, that’s why this hat is one of my favorites still!
Happy hooking,
Katie